Monday, December 15, 2014

Tomato and Herb Baked Eggs

I've been doing a lot of recipe testing for the opening of my restaurant in a month. Costa Rica here I come! And I love the ease, healthiness and lightness of this dish. It's a great make-ahead brunch item and it tastes delicious!! I highly recommend adding this to your holiday brunch menu! 


Tomato and Herb Baked Eggs 

Fridge:
6 eggs 
1 1/4 cups red pepper, diced (1 large pepper) 
1 tsp thyme, minced 
1/2 tsp rosemary, minced 
6 tbs ricotta cheese
6 tsp parmesan cheese, grated
3 tsp chives, sliced (optional) 

Counter:
2 cloves garlic, minced 
3/4 cup yellow onion, diced 

Pantry: 
1 (14.5 oz) can diced tomatoes, drained slightly (or 1 1/2 cups fresh tomatoes diced) 
2 tbs tomato paste
1 cup tomato sauce 
2 tsp oregano
1 tsp paprika 
1/4 tsp salt 
2 tbs olive oil 
Few cracks of black pepper 

Tools:
Medium pot
Wooden spoon 
Measuring cups/spoons
Cutting board
Chopping knife
6 ramekins or medium casserole dish 
Ladle 

Heat the pot over medium heat and add the olive oil. Once oil is hot- add onions, red peppers and garlic. Sauté for a 5-6 minutes and then add the tomato paste. Cook for a minute and then add the tomato sauce, diced tomatoes, thyme, rosemary, oregano, paprika, and 1/2 tsp salt. Turn heat down to low and simmer the sauce for 15-20 minutes, allowing the sauce to reduce and thicken, while stirring occasionally.

At this point you can turn off the heat and allow the sauce to cool. You can refrigerate this sauce for up to 5 days (or freeze it for a month).

Or remove from the heat and allow to cool slightly. Preheat your oven to 350 at this point. 

Using your ladle- pour about 1/2 cup of sauce into each ramekin or pour the entire pot of sauce into the casserole dish. 

Add 1 tbs of ricotta to where you plan to crack the egg. In the casserole dish- separate the dollops of ricotta every 3-4 inches. Crack one egg on top of each ricotta dollop and then sprinkle each egg with 1 tsp of grated parmesan and finish with 1/2 tsp of chives on top. Top with a little bit of freshly grated black pepper. 

Bake the ramekins or casserole dish for 12-15 minutes or until the whites of the eggs begin to set and turn white. If you want firmer eggs bake for another 5 minutes or broil for a minute. 

Remove from the oven and allow to cool slightly for 5 minutes. The eggs will continue to cook- which is why you take them out earlier than prefered. 

Enjoy this with a side salad or like I did with homefries, avocado and bacon. This is so good and so easy!! Perfect brunch meal!! Enjoy! Xo


Friday, December 12, 2014

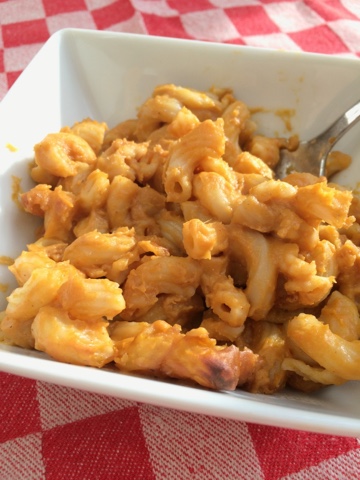
Butternut Squash Mac n Cheese

My friend Elizabeth has been harassing me (love you Beth!) about my butternut squash mac n cheese that I made her and her kids last year. Unfortunately it was one of the recipes I had thrown together and not paid attention to. So today I decided to pay attention while remaking this dish. It's an easy dish and packs in the vegetables and the kids love it! 


Butternut Squash Mac n Cheese 

Fridge:
48 oz butternut squash- peeled and cut small (the grocery store does this for you now- woohoo!!) or 5 1/2 cups pureed 
2 cups sharp cheddar, grated 
3/4 cup parmesan, grated 
1 cup whole milk 
1 tsp Dijon mustard 
1/2 tbs butter (olive oil if you prefer) 

Counter:
1/2 cup yellow onion, minced
1 garlic clove, minced 
2 cups waterm
1/2 cup pasta water

Pantry:
3 cups elbow noodles, uncooked 
1 tsp salt plus extra for pasta water 
1/8 tsp ground nutmeg 
Few cracks of black pepper 
Canola oil spray 

Tools:
Large pot of boiling salted water
Measuring cups/spoons 
Chopping knife
Cutting board 
Wooden spoon 
Blender or food processor 
Large pot with lid 
Small sauté pan 
Colander 
Ladle 
Casserole dish 
Aluminum foil 

Add 2 cups of water, 1/2 tsp salt and the butternut squash to the pot with the lid.
Cover and steam the butternut squash over medium heat for 20 minutes or until the butternut squash is super tender when pierced with a fork. You essentially want butternut squash mush. 48 oz makes more than 5 1/2 cups but I usually set some aside for soup. 

Add pasta to the boiling salted water and cook for 5 minutes. You want the pasta undercooked so it's not soggy later. Drain the pasta, while reserving 1/2 cup of pasta water, and run the pasta under cold water to stop cooking. Set aside for later. 

Melt butter over medium heat in sauté pan. Add the onions and garlic and cook for 5-7 minutes or until onions have softened. Set aside. 

Once the butternut squash is steamed- don't drain. Most of the water should have evaporated after 20-25 minutes. Ladle 5 1/2 cups of the puree into the blender or processor. Add milk, reserved pasta water, ground numeg, 1/2 tsp salt, both cheeses, Dijon mustard, onion and garlic mixture and a few cracks of black pepper. Blend until smooth. 

Spray casserole dish and add the undercooked pasta. Pour the sauce over the pasta and mix well. Cover with aluminum foil and put in the oven. Bake for 25 minutes covered. Remove foil and bake for another 10-15 minutes uncovered. Remove from oven and cool for 15 minutes before serving. Enjoy it!! Xo


Wednesday, December 10, 2014

The BEST Oatmeal Raisin Cookies Ever

This week Charlie (the almost 19 month old) had his holiday party at what I call his "school". I figured taking sweet stuff might be frowned upon but oatmeal raisin cookies are sorta healthy, right?? 

Needless to say I realized at the end of my mixing, we had no raisins and had to resort to dark chocolate chips- so it ended up being slightly sweeter than anticipated. The kids (and parents) weren't complaining!! BUt today I remade the cookies with raisins and they really are addicting- no matter what you put in them. The chocolate chip batch was gone in a day and I don't think the raisin batch will last much longer. This is a true sign of a great recipe!!


The Best Oatmeal Raisin Cookies Ever

Fridge:
2 sticks butter- softened 
2 eggs 

Pantry:
1 1/2 cups ap flour
1 1/2 cups quick cooking oatmeal
1 cup raisins 
1 cup brown sugar
1/2 cup white sugar 
1/2 tsp salt
1 tsp baking powder
1 tsp baking soda
1 tsp vanilla 

Tools:
Large mixing bowl
Medium mixing bowl
Spoon
Electric hand mixer 
Baking spatula 
Baking tray 
Measuring cups/spoons 

Preheat oven to 325 degrees.

In the large bowl add the softened butter and both sugars. Beat with the electric mixer for 3-4 minutes or until the mixture looks creamy. Add the eggs, one at a time, beating after each egg. Then add the vanilla extract and beat again. 

In the other medium bowl add the flour, salt, baking powder and baking soda. Mix well. Pour this bowl into the large wet ingredient bowl. Using your spatula- hand mix this together. Then add your raisins and oatmeal and mix until just combined. 

Using your spoon, scoop a couple tablespoons of batter onto your baking tray. Spoon the batter a few inches apart because they will spread. Bake for 10-12 minutes in the oven. 

These cookies come out soft and chewy. They are delicious!! Enjoy! Xo 


I made them mini for the kids! 


Tuesday, December 9, 2014

Rosemary Maple Pork Chops with Carrot & Cranberry Relish

These pork chops are so simple to make and pack a really great flavor! And since every year- post Thanksgiving- I'm left with an extra bag of cranberries, why not make a sweet and tart relish to go with it? I loved this dish so much I ate it for lunch and twice for dinner. I didn't give the kids the relish but they sure did enjoy the pork chops. Try it out!! 


Rosemary Maple Pork Chops with Cranberry & Carrot Relish 

Fridge: 
4 pork chops, bone in or out, your choice (I used boneless bc they were on sale) 
1 1/2 tbs Dijon mustard
3 1/2 tbs maple syrup 
1 tbs rosemary, minced 
1 1/2 cups cranberries 
1 1/2 cups carrots, grated
1/2 tbs orange zest, I used 1 orange 
1/2 cup orange juice (I juiced the zested orange) 

Counter: 
1/2 cup water 

Pantry: 
1 tbs olive oil
1/2 tsp salt plus 1/2 tsp 
Few cracks of black pepper 
1/4 tsp ground ginger 
1/4 cup sugar plus 2 tbs 

Tools:
Small bowl
Whisk
Blender or food processor 
Grill plate or actual grill 
Gallon size ziplock bag
Medium nonstick pot 
Mixing spoons 
Measuring cups/spoons 
Plate
Aluminum foil 

Marinate the pork chops for an hour or two: mix together maple syrup, 1/2 tsp salt, Dijon mustard, olive oil and minced Rosemary. Put pork chops into the ziplock baggie. Whisk marinade well and pour into the bag. Try to remove all air from the baggie and then refrigerate while it marinates. You can marinate overnight- I just marinated it for an hour and half and it still tasted fantastic! 

The relish: 
Add the cranberries, orange zest, water and orange juice to the blender. Pulse until the cranberries are minced. Add everything to the nonstick pot. Add ground ginger, 1/2 tsp salt, sugar and grated carrots. Place on the stovetop on medium to low heat. Allow relish to simmer for 30-40 minutes. Remove from heat and cool. This can be refrigerated for up to 2 weeks in airtight container. 

Heat your grill or pan over high heat. Depending on your size of pork chops and whether or not it is bone in- it can take approx 4-7 minutes per side. You want to cook your pork until just under well done- you want the center to be barely pink- otherwise it gets over cooked and tough. I grilled mine outside (in the freezing cold) but it was worth it! It was so juicy and you can't beat the beautiful grill marks! Remove from grill and cover with aluminum foil for 5 minutes to allow juices to redistribute. 

This meal is fancy enough to make for a dinner party (serve it with scalloped sweet potatoes or my farroa & quinoa autumn salad) and it's easy enough to make for just the family. Enjoy it!! Xo


Monday, December 8, 2014

Hello Dolly!

I don't if you call these Hello Dollies or 7-layer cookie bars or coconut chocolate nut bars but whatever you want to call them- they are a mighty delicious, decadent dessert! These are incredibly easy and they make a great holiday party dessert. It took all of 5 minutes to throw together and after 28 minutes of baking- they were ready to go. Try them out this holiday! 


Hello Dollies

Fridge: 
1 1/2 sticks butter, melted 

Pantry:
2 sleeves of graham crackers, crushed- approx 3 cups
7 oz bag of coconut flakes, sweetened (I would have used unsweetened but they didn't have any at the store) 
1- 10oz bag of dark chocolate chips 
3/4 cup pecans, chopped small
3/4 cup walnuts, chopped small 
1/2 tsp salt 
1/8 tsp cinnamon 
1 -14oz can sweetened condensed milk 
Canola oil spray 

Tools:
Casserole dish
Spoon
Bowl 

Preheat oven to 350 degrees. Spray your casserole dish with canola oil. 

Take your crushed Graham crackers and pour into the tray. Add salt and ground cinnamon and mix with spoon. Pour melted butter over the crushed crackers and mix well. Once butter is mixed into the Graham crackers- press it all down to create your bottom layer or crust. 

Then take your chocolate chips and pour right on top of the Graham cracker crust. Spread out evenly. 

In the bowl add coconut flakes and both nuts. Mix well and then spread evenly over the chocolate chips. 

Use your spoon to drizzle and spread the condensed milk over the entire baking dish. Place in the oven and bake for 28-32 minutes or once the edges become golden and the coconut flakes brown slightly. 

Allow to cool for 10-15 minutes before slicing. For clean slices, cool completely and refrigerate for 30 minutes before slicing. Enjoy them!! Xo


Each layer! 


Hot out of the oven! So good! 

Friday, December 5, 2014

Meat Pies!!

Growing up in Fiji, meat pies were a part of everyday life. It is your afternoon snack after school or your dinner at the Royal Suva Yacht Club (who served the BEST meat pies). You can find meat pies at the local bodega or the Chinese take out place. They are everywhere. So this is my ode to my childhood of meat pies, always served with ketchup. 


Meat Pie

Fridge: 
2 packages of pie dough (there are two per package)
1 1/2-1 3/4 lbs ground beef 
1 cup carrots, small dice
1 cup celery, small dice 
1 cup onions, minced 
1 cup mushrooms, sliced or diced 
1 tsp Rosemary, minced 
1/2 tsp thyme, minced
1 tbs Italian parsley, minced
1 egg 
2 tbs heavy cream
1/2 tbs butter 

Counter: 
1 garlic clove, minced 

Pantry: 
1 1/2 tbs ap flour 
1 1/2 tbs Wostershire sauce 
1 1/2 tbs ketchup 
1 1/2 cups beef stock 
1 tbs tomato paste 
1/2 tsp salt plus 1/2 tsp 
1/4 tsp black pepper 
1 tbs olive oil 

Tools: 
I used eight 5-inch nonstick pie tins- you can use 1 large pie tray and then only use 1 package of pie dough 
Pastry brush 
Large sauté pan 
Wooden spoon 
Fork 
Whisk 
Small bowl 
Ladle 
Parchment paper 
Pie weights- which I don't own so I used rocks from the driveway (hey, it works) 

Preheat oven to 350 degrees. Roll out your dough and line each pie tray with enough dough to cover the lip at the top. Using a fork, poke holes into the bottom. Then place parchment paper into the pie bottom and place pie weights into the dish to blind bake the crust. I could find nothing to blind bake with at work so I decided to use the tiny rocks from the driveway. They worked great! (See photo) 

Blind bake the crust for 10-15 minutes or until the crust turns a very light brown. Remove from oven and remove the weights and allow to cool. 

Preheat your sauté pan over medium heat. Add olive oil and once heated add onions, garlic, carrots, celery and mushrooms. Cook for 5 minutes, while stirring occasionally, and then add your minced parsley, 1/2 tsp of salt and a few cracks of black pepper. Cook for another 5 minutes until vegetables are al dente. 

Remove vegetables from heat and place in a bowl for use later. Add 1/2 tbs of butter to the same uncleaned pan and once melted, add your ground beef. Begin to break the beef up with your wooden spoon. Add 1/2 tsp of salt and 1/4 tsp of black pepper. Cook until meat is crumbles and browned. Remove the meat from the pan while reserving 1 tbs of drippings in the sauté pan. 

Keep the drippings over medium heat on the stove. Add the flour and cook for a good 2-3 minutes while stirring. Once flour has cooked, add the tomato paste and cook for another minute. Then add the beef stock, ketchup, Wostershire sauce, and the remains herbs: rosemary and rhyme. Simmer these ingredients until the sauce thickens slightly. Then add the ground beef and vegetables back into the sauté pan. Mix everything together and then turn off heat. At this point, the filling can be refrigerated for 3 days before making pies. 

Once filling has cooled- ladle your filling into the bottom crust. The more filling the better, in my opinion. Take the egg and whisk it in a small bowl. Brush the edges of the filled pie crusts with your egg wash. Then place the top crusts onto the bottom crusts and press the seams together gently. Continue this process with all the pies. 

Add the heavy cream to the remaining egg wash and then brush all the pie crusts and edged very well. Bake at 350 for 20-25 minutes or until the crust is a beautiful golden color. 

I ate mine with a simple salad and opened the top and dumped ketchup inside- it's the Fijian (read:best) way of eating the pie! Enjoy! Xo


I totally used the driveway to blind bake the crust. 


My filling is on the drier side because I like to eat meat pies on the go, and although the filling has tons of flavor- I get none of it on my pants!! If you like more saucy pies- add more beef stock. 


Thursday, December 4, 2014

Dark Chocolate Drizzled Caramel Popcorn

The month of December always reminds me of those giant tubs of tri-flavored popcorn. I always avoided the cheese (even though I liked it) and the butter flavor and dove right into the caramel section. I was addicted. Still am. I had to leave this batch in another room to avoid finishing it all. 
This is my version of that delicious caramel popcorn but taken up a notch with some dark chocolate drizzled all over. This keeps for a couple weeks in an air tight container and makes a great hostess gift or party favor when put into a mason jar. That's if you can keep yourself from eating it all. 


Dark Chocolate Drizzled Caramel Popcorn

Fridge:
1/2 cup butter (1 stick) 

Pantry:
1/4 cup canola oil
1 1/2 cups popcorn kernels 
1/2 cup white sugar
1/2 cup of brown sugar
1 cup dark chocolate chips 
1/3 cup light corn syrup
1 tsp vanilla extract 
1/2 tsp baking soda 
1/2 tsp salt 

Tools:
1 large pot with tight lid
Medium nonstick pot
Wooden spoon or heatproof baking spatula 
Large tray with silpat or lined with parchment paper 
Large bowl sprayed lightly with canola oil 
Small microwaveable bowl 
Spoon 

To pop the popcorn: add canola oil to the pot with lid. Begin to heat over medium and once hot add the popcorn kernels and place the lid on top. Allow the popcorn kernels to pop until the popping slows to a pop every couple seconds. I like to stir my popcorn while popping- which sometimes ends up with popcorn overboard but I think it keeps kernels from burning. 

Once popcorn has popped. Measure out 12 cups. Place onto your lined baking tray. Preheat oven to 325 degrees. 

In the medium nonstick pot add the stick of butter, both sugars and corn syrup. Turn on the heat to medium low and continuously stir with your wooden spoon until the sugars and butter melt and begin to simmer. It's key to continue stirring so the caramel doesn't separate and become oily. Once it begins to simmer, turn heat to medium and allow it to boil for 4 minutes. I usually set a timer. At this point I put the popcorn tray into the oven to warm the kernels up- this makes it easier to mix the caramel and popcorn later.

After the four minutes are up-  turn off heat and add the baking soda and vanilla extract. It will bubble up a bit- so be aware. Remove the popcorn from the oven. 

Slowly pour the caramel onto the warmed popcorn and using the same wooden spoon- stir and mix the popcorn with the caramel- so it doesn't clump a lot. It will clump a little which is fine. Once the caramel is poured over the popcorn and mixed over evenly- place the whole tray into the oven. Bake for 1 hour. 

Remove from oven and allow to cool. Once cooled- break up any large chunks of caramel and popcorn. 

Take the chocolate chips and place into the microwaveable bowl. Heat for 20 seconds and remove and stir. Continue to do this until the chocolate chips are melted and chocolate is smooth and hot. I microwaved mine for 20 seconds, stirred, 20 seconds, stirred, 20 seconds, stirred, 15 seconds, stirred, 10 seconds, stirred and it was ready to drizzle. 

Using the same spoon just drizzle and move all over the cooled caramel popcorn. Allow the chocolate to set/dry and then enjoy this fantastic treat!! Keep in airtight container if not eating right away. Good luck with that! Xo


Caramel boiling 


Drizzling the caramel 


Finished product


Charlie couldn't wait to try it!! 

Wednesday, December 3, 2014

Pumpkin Pie Oatmeal

Tis' the season for pumpkin pies. My soul loves them- my waist does not. So as much as I'm craving that extra slice with a giant dollop of freshly whipped cream- I have to use my willpower and say no. Well...really my uncle Jack had to take the rest of the pie home with him because I have zero willpower when it comes to desserts. 
So I debated making my own pie to hoard to myself- but I stayed strong and made a surprisingly really good substitution: pumpkin pie oatmeal. The kids loved it and I have zero guilt. Winner, winner...


Pumpkin Pie Oatmeal 

Fridge:
1 cup milk 

Counter:
3/4 cup water

Pantry:
1 cup quick cooking oats 
3/4 cup pumpkin purée
1/2 tsp pumpkin pie spice 
1/4 tsp ground cinnamon 
1 1/2 tbs brown sugar
1 tbs maple syrup 
Pinch of salt 

Optional toppings: raisins, dried cranberries, pepitas, nuts- whatever you want

Tools:
Medium pot (nonstick is easier to clean) 
Mixing spoon

Combine all the ingredients (except optional toppings) into the pot. Stir well and put onto a medium to low stovetop. Continue to stir every minute until the oatmeal begins to bubble slightly- then stir constantly while it cooks. I prefer my oatmeal a little al dente and so only cook mine for 2 minutes but usually it takes 3 to 5 for it to become creamy and thicken. 

If it becomes too thick- add some milk to thin it out. 

This is such a simple and delicious way to start the day! Add it to your repertoire! Enjoy! Xo

Tuesday, December 2, 2014

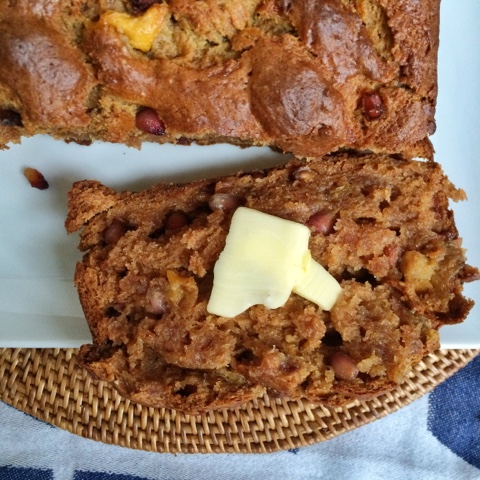
Persimmon & Pomegranate Bread

I will admit that I have never cooked with persimmons until today. I have had them in salads but that's about my extent of my knowledge and use. Shame on me! Now that they are in season- I'm going to try to use them more often. I have also been wanting to add pomegranates to a bread/muffin for a while now to see if the crunch with make up for not using nuts (my boss is allergic). And I will say that the combo of these two winter fruits make quite a tasty treat! Now I want to try persimmon ice cream with pomegranate syrup. On the to-do list! 


Persimmon & Pomegranate Bread

Fridge:
1/4 cup butter, melted
2 eggs 
1 cup pomegranate seeds*
2 cups ripe persimmon, puréed 

Pantry:
3 cups ap flour
1 cup white sugar
1/2 cup brown sugar 
1/2 tsp vanilla extract 
1/2 tsp salt
2 tsp baking powder
1/2 tsp baking soda
1/2 tsp ground cinnamon 
1/8 tsp ground ginger
1/8 tsp ground nutmeg 
1/4 cup canola oil
Canola oil spray 

Tools:
Bread baking tray 
Electric hand mixer 
Spatula 
Measuring cups/spoons 
2 medium bowls 

Preheat oven to 325 degrees. Spray your bread tray with canola oil. 

In one bowl add flour, both sugars, baking powder, baking soda, salt, ginger, cinnamon and nutmeg. Mix well. 

In the other bowl, add the persimmon puree, eggs, vanilla extract, melted butter and canola oil. Use your electric hand mixer to blend well. 

Pour 1/2 the dry bowl into the wet bowl. Mix with electric mixer until combined. Then add the rest of the dry ingredients to the bowl. Mix well again. Using the spatula, hand mix in the pomegranate seeds. 

Pour the batter into the greased baking tray. Place into the oven and bake for 55 to 1 hour 10 minutes. The top should be a medium brown and a toothpick should come out clean when pricked into the center. 


*A great way to get pomegranate seeds out of a pomegranate is to cut the pomegranate into four pieces on a plate, the juice can stain boards. Put a colander into a large bowl and fill it with water. Put the four pieces into water and pull the seeds out. The white pith of the pomegranate floats and is easier to remove this way as it separates from the seeds. Once the seeds are out and you have removed the pith, you can lift the seeds out with the colander- takes all of five minutes! 


Tuesday, November 25, 2014

Roasted Beet & Lentil Vegan Burger

Because I'm about to eat my weight in turkey this week I always try to healthy up until Wednesday night- then the holidays begin and I pretty much don't stop eating. Well I have food comas in between binging. What, no judgements?! I love food. 
So I decided to roast some beets and use up some leftover lentils I had to make a vegan (and gluten free) burger. And even though nothing compares to actual burgers in my mind- I really loved this sandwich!! It was filling and I still felt light after eating it aka the opposite of Thanksgiving full. 


Roasted Beet & Lentil Burger 

Fridge:
2 cups roasted beets*, cubed 
1 1/2 cups lentils, cooked
1 tbs italian parsley minced 

Counter:
Zest of 1/2 lemon 
Juice of 1/2 lemon (approx 1 1/2 tbs)

Pantry:
2 1/2 tbs flour (I used gluten free cup4cup flour) 
1/4 tsp ground cumin 
1/2 tsp salt
Few cracks of pepper 
1 tbs olive oil 

Optional: tomatoes, lettuce, avocado, burger buns

Tools:
Food processor or blender
Measuring cups/spoons 
Medium mixing bowl
Mixing spoon 
Nonstick sauté pan 
Spatula 
Paper towel lined plate 

Add roasted beets, lentils, lemon zest, lemon juice, minced parsley, cumin, salt and pepper to the food processor. Pulse until semi-smooth and well combined. 

Move into a bowl and add the flour- mix well with spoon. Once combined, use your hands to form 4 patties. I recommend using gloves if you don't want your hands to turn pink. 

Heat oil over medium heat in nonstick pan. Once hot- add your patties. I could only cook two at a time because of my pan size. Cook for 2-3 minutes per side. 

Remove from the pan and place on a paper towel lined plate to absorb excess oil. 

Serve your burger with whatever toppings you feel like. I kept mine vegan with avocado, lettuce and tomato but next time I would add some goat cheese. Enjoy!! Xo

*to roast your beets: wrap the beets individually in aluminum foil and place on baking tray. Roast at 375 degrees for 45 to an hour. The time depends on the size of the beets. Once a knife pierced through the foil easily- they're done. And then you can use the foil to help remove the peel. I sort of scrape the beet with the aluminum and then I don't have to deal with red dyed hands. 


Just after the food processor 


Monday, November 24, 2014

Turkey Prep Time

It's my favorite time of year! The holidays!! Woohoo! Thanksgiving is by far my favorite holiday- mostly because I get to cook for all the people I love but also because I get to stuff my face with deliciousness all day. Because I cook about seven to nine sides each year (anyone want to come over for leftovers??) I really have to use my time wisely before the big day. Today is the Monday before Thanksgiving and that means I brine my turkey and make my gravy. 

There are two different types of brines: wet or dry. Both add moisture and flavor to your turkey- so really it depends on what you prefer and do you have the fridge space for a wet brine. This year I do not have the fridge space and there I am doing a dry brine. It's very simple- mine took me about 5 minutes- and it really does up your turkey game. Give it a go! 


Dry Brine

Fridge:
16-20 lb thawed or fresh turkey 
1 tbs fresh or dried Rosemary, minced
1 tbs fresh or dried thyme, minced
1 tsp fresh or dried sage, minced 

Pantry:
1 tsp herbs de Provence 
1/4 cup coarse kosher salt
1 tbs brown sugar

Tools:
Small bowl
Spoon
Tray big enough to hold turkey and small enough to fit into your fridge. 

Mix all the ingredients in a bowl except the turkey. Combine well. 

Place turkey on your tray. Be sure to make sure it fits in your fridge and you have space ready to roll. 

Spread the brine all over the turkey- including the bottom and inside the cavity and under the skin. Put the turkey uncovered into the fridge. This can be done up to 3 days ahead of time. 

On turkey day you can cook your turkey any way you prefer. I usually cook mine for the first hour upside down and remaining 2 to 2 1/2 hours right side up. It usually takes about 3 to 3 1/2 hours to cook my 20 lb bird but I ALWAYS use a cooking thermometer. I remove the turkey once it hits 158 degrees and cover it and allow to rest for 45 minutes and it always comes up to 165 degrees- which is what you want with poultry. But first get to brining people!! Xo


Saturday, November 22, 2014

Apple Fritters with Maple Cinnamon Yogurt Sauce

Now we all know fried stuff is not the healthiest but sometimes the weekends are for letting loose and enjoying life, not counting calories. And I do admit- I have never counted calories- I think I would be scared if I did. My motto: everything in moderation but love. Cheesy but 100% true. 
These fritters are yummy and make a great addition to Sunday brunch. Plus the kids really loved them- so great for the whole family! 


Apple Fritters 

Fridge: 
1/2 cup milk
1 egg 

Counter:
3 1/4 cup apples, peeled and grated (I used two Granny Smith and two Roma apples)

Pantry:
1 1/2 cups ap flour 
1/4 cup white sugar plus 1/4 extra 
1/2 tsp salt
2 tsp baking powder
1 tsp baking soda 
1/2 tsp ground cinnamon 
1/4 tsp ground ginger
1/4 tsp ground nutmeg 
1/2 tsp pumpkin pie spice
1 tsp vanilla extract 
Enough canola oil to fill your pot 3 inches deep 

Maple Cinnamon Yogurt Sauce

Fridge:
1 1/2 cups greek or plain yogurt

Pantry:
1 1/2 tbs maple syrup 
1/4 tsp cinnamon 
1/2 tsp vanilla extract 

Tools:
Medium mixing bowl
Large mixing bowl
Wooden mixing spoon
Measuring cups spoons 
Medium high sided pot
Small bowl
Whisk or fork 
Box grater 
Tongs
Plate covered in paper towels 

Add your canola oil to your pot and begin to heat over medium to medium high heat. You can test if the oil is hot enough by placing the end of your wooden spoon in the center of the pot- if bubbles rapidly stream up the sides- it's ready. 

In the medium mixing bowl add 1/4 cup sugar, 1/2 tsp cinnamon, 1/4 tsp of numeg, 1/4 tsp of ginger and mix well. Then add your grated apples to the bowl and cover with your sugar spice mixture. Add the milk and egg to this and combine very well. 

In the large bowl add flour, baking powder, baking soda, salt, pumpkin pie spice and remaining 1/4 cup of sugar. Mix well and then pour your grated Apple mixture into this bowl. Combine and set aside until oil is ready to cook. 

Once oil is ready use an ice cream scoop or 1/4 cup measuring cup to scoop the batter into the oil. I could oil fry 4-5 at a time because my pot was smaller- do not overcrowd the pot because the temperature will drop and cause uneven cooking. 

Use your tongs to cook each side of the fritter- it should take a minute or two per side. Once a deep golden brown- remove from the oil and place on the paper towel lined plate. Contine cooking and allow the fritters to cool a few minutes before enjoying! 

To make the sauce: combine all the sauce ingredients in a bowl and mix. Enjoy it! Xo


Finished batter before cooking 


Friday, November 21, 2014

French Onion Soup

I LOVE french onion soup. It's one of my always order items when it's on a menu. Even in the dead heat of summer- I'll order french onion soup if a restaurant will make it for me. It makes me happy. But for some reason I always avoided making it because I thought it would be an undertaking. But in reality- it's really simple (minus bawling while cutting onions) and delicious. And it can be dressed up for a party or enjoyed in pajamas while watching Scandal. And it can be made a few days ahead and tastes even better! This is a great fall/winter comfort meal! 


French Onion Soup

Fridge: 
3/4 cup apple cider 
2 large sprigs thyme (approx 3/4 tbs) 
2 tbs butter 

Counter:
6 1/2 cups yellow onions, thinly sliced 
2 garlic cloves, minced 
1/3 cup dry white wine 
1/2 cup apples, peeled and grated (I used a small Granny Smith) 

Pantry:
4 cups beef stock
2 1/2 cups chicken stock 
2 bay leaves 
1 1/2 tsp salt
1/4 tsp black pepper 

Optional topping:
Rustic bread, I used Portuguese 
Swiss cheese of your choice- Gruyere, Emmental, jarlsberg- whatever. 

Tools:
Large dutch oven with lid
Wooden spoon 
Cutting board
Chopping knife 
Measuring cups/spoons 
Box grater 

Melt butter over medium to low heat in the dutch oven pot. Once melted add your onions and 3/4 tsp of salt- stir and then allow to sit for 10 minutes to begin to sweat. Add your minced garlic and stir in. Continue to allow the onions to sweat and caramelized, only stirring every five minutes or so. The onions should reduce in size by half and they should begin to become a dark golden brown. Be careful to not burn the edges as this can result in a burned taste in the soup. Turn heat lower if this begins to happen. Just allow the onions to slowly caramelized- the whole process can take between 30-45 minutes. 

Once onions have caramelized, preheat your oven to 325 degrees. Add the white wine to the pot and allow to simmer for a few minutes and reduce. Then add the apple juice, both chicken and beef stock, thyme, bay leaves and remaining 3/4 tsp salt and 1/4 tsp of black pepper. Bring the soup to a simmer and then cover with the lid and place in the oven. Cook for 1 hour in the oven. 

Remove soup from the oven and allow to cool for 10 minutes before tasting and seasoning to your preference. 

To serve: I lightly toast my bread and then you have two choices. Sometimes I prefer to eat the soup with couton style bread to avoid the stringy cheese dripping bites. And sometimes I like the stringy cheese drippy bites and use a full slice of bread. Once bread is lightly toasted you can cut it into cubes for crouton style and place on a lined baking sheet. Grate your Swiss cheese over the bread cubes and broil for a few minutes on high- checking frequently to avoid burning. 

OR you can fill a oven proof soup bowl with soup and place a lightly toasted piece of rustic bread on top with either a slice of Swiss cheese or grate cheese all over it- typically a lot of cheese! Place under a high broiler and broil for a couple minutes while cheese melts, gets bubbly and golden brown. This results in the stringy drippy cheese. Both versions are delicious- one just makes for more civilized eating. Enjoy it! Xo


Crouton and more civilized eating version

Stringy drippy more cheesy version

Wednesday, November 19, 2014

Orange Cranberry Pecan Muffins

I always try to make some sort of bread or muffin that the kids can snack on all week and I try to make it healthy, but tasty and I will say that this muffin was a success this week! The kids enjoyed it and I must say I also did. Eating muffins warm out of the oven is just heavenly. It's nice to have homemade muffins/bread on the counter that you can grab on-the-go, especially with kids. To me- it makes much more sense to spend 10 minutes making a batter to throw in the oven than giving your kids store bought baked goods with ingredients you can't pronounce. It's really a no-brainer. And once you get the hang of making muffins/bread- you can make tons of varieties to mix it up and usually the base batter stays the same. It's simple and worth it! 


Orange Cranberry Pecan Muffins

Fridge:
1 egg
1/4 cup sour cream 
1/2 cup milk 

Counter:
1/2 tbs orange zest
1/4 cup orange juice, I squeezed mine fresh from the orange- hence this being in counter section 

Pantry:
1 3/4 cups ap flour 
1 cup sugar
1/2 cup dried cranberries
1/2 cup pecans, chopped
2 tsp baking powder
1/2 tsp salt
1 tsp vanilla extract 
1 tsp pumpkin pie spice 
1/3 cup canola oil 
Canola oil spray or muffin liners 

Tools:
Large bowl
Medium bowl
Whisk
Spoon or ice cream scoop
Measuring cups/spoons 
Muffin tray 

Preheat oven to 350 degrees. Spray muffin tray with canola or baking spray. Or use liners. 

In the large bowl add flour, salt, baking powder and pumpkin pie spice. Mix well. 

In medium bowl whisk together the egg, sour cream, milk, canola oil, vanilla extract, orange zest and orange juice. Whisk well. 

Pour the liquid bowl into the dry bowl. Combine well and then add the cranberries and pecans. Mix and spoon batter into the muffin tray. Full 3/4 of the way up. Place tray into the oven and bake for 27-30 minutes or until the muffins are a golden color and firm but spongy to touch. 

Remove from oven and allow to cool for a few minutes before enjoying one (or two) still warm! Xo 


Tuesday, November 18, 2014

Stover Beef Stew

This week was my dear friend Anne's birthday and one of the many reasons we have always got along so well is that we both love food, passionately. Now that I think about it a  great portion of our memories revolve around food. She taught me that you can use mayo instead of butter on a grilled cheese, she introduced me to Boursin cheese, and she taught me how to make her mother's super easy, delicious, heart warming, perfect-for-cold-weather beef stew. I can easily whip up a beef bourguigbon and go the fancy French route with beef stew but I like the comfort and simplicity of this stew. It really works for the busy family! 


Stover Beef Stew

Fridge: 
1 3/4 lbs stewing beef, cubed 
2 cups carrots, 1/2 inch slices
3/4 cups white button mushrooms, sliced 
1/2 cup celery, 1/2 inch slices

Counter:
1/2 cup yellow onions, diced 
1/2 cup water 

Pantry:
2 cans of Campbell's french onion soup
2 cans of Campbell's golden mushroom soup
1 tsp salt
1/2 tsp black pepper 
1 tbs olive oil 

Tools:
Large Dutch oven or pot that can go into the oven with lid 
Tongs 
Cutting board
Chopping knife
Measuring cups/spoons
Wooden spoon 
Large plate 

Preheat oven to 275. 

Heat Dutch oven over stovetop at medium heat. Add olive oil and heat. Sprinkle 1/2 tsp salt and 1/4 tsp of black pepper over beef cubes. In batches sear the beef pieces for a couple minutes on each side to get some color on the beef and caramelization in the pot. Use the tongs to remove the beef to a plate. And continue searing the rest of the beef. Do not overcrowd the pot while searing the beef. 

Once beef is seared and set aside, add in all the vegetables at once to the pot. Do not clean or rinse the pot. Add 1/2 tsp salt and 1/4 tsp of black pepper. Mix well and sauté for 3 to 5 minutes. 

Add the beef and all its juices back into the pot. Mix well and add the 4 cans of Campbell's soups and 1/2 cup of water. Stir the soups into the pot and cover the Dutch oven with its lid. Place into the oven and cook for 3 hours. Stir a few times throughout the cooking process. 

Remove from oven and serve with your choice of sides- the kids wanted egg noodles and that's how the Stovers serve it as well. But zoodles, rice, pasta or quinoa would work as well. And a couple slices of rustic bread with butter- perfection! Enjoy this! I'm currently eating it for my mid morning snack! So good! Xo

Searing beef- don't overcrowd the pan. Meat needs space to dear well.