Thursday, August 28, 2014

Farm Stand Gazpacho with Watermelon & Corn Relish

Summer is the season of watermelon, corn and tomatoes. This is usually the time of the year that I make a ton of recipes using these items. They are just perfectly ripe, sweet and delicious during the summer months and yes you can get them 12 months a year now but it's just not the same taste. So work these three ingredients into your life the next month or so because they'll be gone before you know it. 
And luckily I have an amazing farm stand open every day just down the road from work. Sandy's Summer Stand in between Riverside and Cos Cob in Connecticut is the perfect place to grab fresh local summer produce. Go find your farmers market or local roadside stands and grab some summer delights!
And best yet- this gazpacho requires just some rough chopping and a blender. It's mindless cooking. And yet it's impressive and delicious as well. Perfect for a end of the summer dinner party- and if Charlie, a 15-month old, devours it- anyone will!! Try this one people!! 


Farm Stand Gazpacho with Watermelon & Corn Relish 

Fridge: 
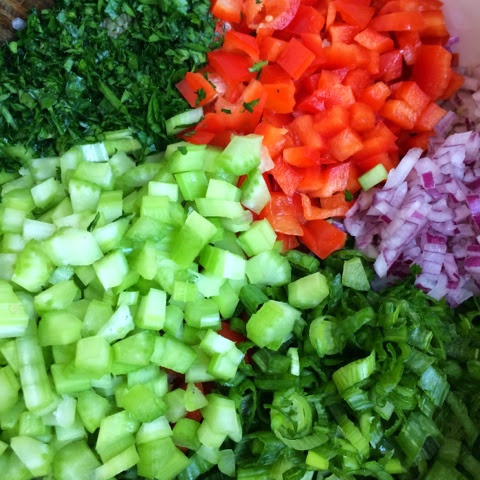
1 small cucumber, peeled and roughly chopped 
1 small red pepper, deseeded and roughly chopped
4 stalks scallions, end removed and roughly chopped 

Counter:
3 large ripe tomatoes 
1/4 of medium red onion, roughly chopped 
4 garlic cloves

Pantry:
1/2 cup olive oil
2 tbs sherry vinegar
1 tsp salt
1/2 tsp black pepper 
1/4 tsp cumin 

Tools:
Blender or food processor
Large bowl
Mixing spoon
Measuring cups/spoons
Cutting board
Chopping knife
Peeler 
Plastic wrap

Take all the ingredients and add them to the large bowl. Cover with plastic wrap and marinate for 2-4 hours or overnight if you prefer. 

After the ingredients have marinated, add them in batches to your blender or food processor and blend or pulse until desired consistency is reached. I like mine slightly chunky. If you prefer completely smooth- you can run it through a sieve or chinoise post processing. 

Once processed, add it to a Tupperware and refrigerate for a few hours. I like to do this part overnight to allow the flavors to really meld. Gazpacho is always best a day or two after it's made. 


Watermelon & Corn Relish

Fridge:
1 1/2 cups watermelon, diced small
Cooked and cooled corn removed from 1 ear of corn
6 leaves of basil, julienned 

Pantry:
Pinch of salt
Crack of black pepper

Tools:
Medium mixing bowl
Mixing spoon 
Cutting board
Chopping knife
Measuring cups

Add all the ingredients to the bowl and mix. Place a tablespoon or two in the center of the chilled soup for serving. 

It's a great balance of the zestiness of the gazpacho and the sweetness of the watermelon, basil and corn. 

I just love this recipe, it's so delicious and simple to make! Enjoy it! Xo


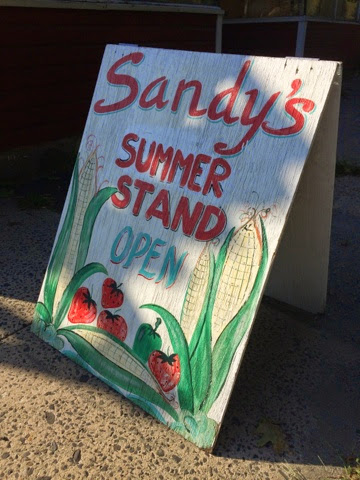
Summer farm stands are the best!! I got every ingredient (minus the seasonings) from this stand. Bonus- one trip shopping! 


Tuesday, August 26, 2014

Shrimp in Mango Sauce

Is it weird that I'm allergic to mangoes, yet they are my favorite fruit?!? It's true. I can eat maybe one mango (sometimes less) without breaking out into a rash. But I'd totally take the facial rash than never eat a mango again. They're amazing!! And so why not join my favorite fruit with some yummy shrimp?? Get on this train- it's heading to deliciousvile.

Yea I just said that. 


Shrimp in Mango Sauce 

Freezer:
2 1/4 cups mango- defrosted (if you prefer fresh- use it)

Fridge:
1 lb shrimp, peeled, deveined- size of your choice (this recipe makes a good amount of sauce you can use a 1.5 lbs if you prefer) 
3/4 cup heavy cream
1 medium red pepper, julienned 
1 tbs cilantro, minced 


Counter:
1/2 medium red onion, sliced thin
2 garlic cloves, minced 
1 tsp ginger, grated 

Pantry:
1/2 tbs olive oil 
1/2 tsp salt
1/4 tsp black pepper 

Tools:
Blender 
Large nonstick sauté pan 
Mixing spoon 
Cutting board
Chopping knife
Measuring cups/spoons 

Add the mango and heavy cream to the blender and process until smooth. If you prefer chunks- process by pulsing. 

Heat the sauté pan over medium to high heat. Add the olive oil and once hot add the onions, garlic and ginger. Sauté for a few minutes while stirring occasionally. 

Add the red pepper and the mango smoothie mixture. Bring to a simmer while stirring every minute or so.

Sprinkle the shrimp with some of the salt and pepper and then add the rest of the seasoning to the sauce. Add the shrimp and cilantro to the sauce and sauté for a few minutes until they turn reddish in color and tails barely begin to curl. Turn off heat. 

I served mine with brown rice but it would go nicely over soba or rice noodles, zoodles or just solo. This is a simple and crazy easy, delicious dish! Get on it. Xo


Monday, August 25, 2014

Israeli Couscous Curry Salad

I love the flavor of curry. I know there are the curry haters out there but as a Fijian it's something we ate practically every day. There was always a curry dish at our table. So I love incorporating the spice(s) into all sorts of things now. And this Israeli couscous salad is easy and delicious! Chopping the ingredients might take a few extra minutes but it's worth it and it's a great dish to add to your arsenal for pot lucks. 


Israeli Couscous Curry Salad

Fridge:
3/4 cup carrots, sliced or julienned
1 cup zucchini, grated
1 tbs mint, minced
1 tbs italian parsley, minced
3/4 cup plain Greek yogurt 

Counter:
1 3/4 cups water 

Pantry:
1 1/2 cups Israeli couscous
1 tsp olive oil
1/2 cup raisins 
1/2 cup almonds, slivered or chopped
1 tbs curry powder
1 tsp turmeric 
1/2 tsp cumin powder 
2 tbs honey 
1 tsp salt
1/4 tsp black pepper 

Tools:
Medium pot with lid
Large mixing bowl
Small mixing bowl
Whisk or fork
Wooden spoon or mixing spoon 
Cutting board
Chopping knife
Measuring cups/spoons 

Heat the pot over medium to high heat and add the olive oil. Add the couscous to the pot and brown slightly for a few minutes. Pour the water over the couscous and turn the stovetop to low and put the lid on. Gently simmer until water is absorbed and couscous is cooked. It takes between 8 and 10 minutes. Once cooked, remove lid and mix with a fork to allow steam to release and couscous to cool. 

In the small mixing bowl add the Greek yogurt, honey, curry powder, cumin, turmeric, salt, pepper, italian parsley and mint. Mix well. 

In the large mixing bowl add the cooled couscous, the carrots, raisins, almonds and zucchini. Mix well and then pour the dressing over the top. Mix the salad well. 

You can serve this now at room temperature or you can refrigerate and serve it chilled. I like them both ways but for an outdoor party- chilled works better.
This will keep for 5 days in the fridge. Enjoy it!  


Friday, August 15, 2014

Blueberry Scones with Lemon Glaze

As a kid I always loved cooking and baking. Scones are one of the first recipes I made solo- no parents involved. I used to make to make them for my younger sister and mother and we would pretend we were having high tea with the queen. I was around seven or eight at the time and I found my recipe on the side of a bag of flour. I feel like I made this recipe so often that I no longer needed to use the bag of flour for reference. 

And although my recipe has changed since then- every single time I make scones- the smell of the dough and the taste of the scones just brings me back to that little white plastic table I had afternoon tea on. It's crazy the memories that food can invoke! 

This recipe is delicious and might sound tedious on paper but it's totally easy and well worth the effort. 


Blueberry Scones with Lemon Glaze 

Scones

Fridge:
1/2 pint blueberries, rinsed and dried 
1 stick of butter (8 tbs), cold 
1/2 cup milk
1/4 cup sour cream 

Counter:
1 tsp lemon zest
1 tsp lemon juice

Pantry:
1 3/4 flour plus extra for kneading 
2 tsp baking powder
1/2 tsp baking soda
1/2 tsp salt 
1/3 cup sugar plus 1 tsp extra for sprinkling on top before baking

Glaze:
1 1/2 tbs lemon juice
1/2 cup confectioners sugar 

Tools:
Large baking tray
Two large mixing bowls
Whisk
Mixing spatula 
Box grater
Small mixing bowl
Fork or small whisk 
Rolling pin (wine bottle if you don't have one)
Pastry brush 
Plastic wrap 

I don't usually preheat my oven until I put my scone dough into the freezer to chill for 5 minutes but if you want to be on top of it: preheat oven to 400. 

Cut off 1/2 a tablespoon of butter and place in a small microwaveable bowl. Place the remaining butter into the freezer. 

While butter is chilling, take your dry ingredients and mix together. Add flour, baking powder, baking soda, salt and sugar to one of the large mixing bowls. 

In the other large mixing add the milk, sour cream, lemon juice and lemon zest. Whisk well, making sure to break up the sour cream. 

The butter should have been in the fridge for about 5 minutes at this point- which is fine. Using your box grater on the large grate side- grate your cold butter into the dry ingredient bowl. I just place my grater into the dry ingredients and grate away. 

Using your (clean) hands mix the butter into the dry ingredients. It should become like large grainy sand almost. It does not have to be completely incorporated and you definitely do not want to mix so much that the warmth of your hands melts the butter. Just a minute of mixing is fine. 

Now make a well in the flour/butter bowl and pour the wet ingredients in it. Using your mixing spatula- mix together well. It should form a fairly wet dough. 

Sprinkle your counter top with a little flour and pour your scone dough on it. Knead and fold the dough (sprinkling with a tiny bit of flour if it becomes super sticky) 5 to 7 times. Enough to make the dough come together but do not over knead it- that leads to a dry, tough scone. Form the dough into a flat square and wrap with plastic wrap. Place the dough in the freezer for 10 minutes. Just a little rest and chill time. 

At this point I preheat my oven to 400. And get my baking tray out. You do not have to grease it but I do use a silicone mat because it's there and I don't have to scrub baked blueberry juice off my tray. But it's totally not necessary. Throw down some parchment paper if you don't want to deal with cleaning the tray though- the blueberries do bleed.

Once dough has rested in the freezer for 10 minutes, remove and place on a floured counter top. Using your rolling pin- roll the dough into a rectangle shape. Mine came to be about 1 3/4feet by 8 inches or so. It doesn't have to be exact or precise by any means. Just a rectangle where the dough is about 1/2 to 3/4 of an inch thick still. 

Pour your blueberries on top of the dough and spread across evenly. I do my best to not squish the berries because I like to bite into whole blueberries and it also dyes the dough a bluish tint. Now fold the dough, almost like you're folding a letter- the long way. Here's a photo of mine after folding: 


Mine folded 3 times. You want to keep it wide because this is size of your scone- unless you prefer smaller ones- then roll in half again. 

Take your rolling pin and gently- with almost no pressure roll over the entire length of the dough- just to settle the blueberries and dough into place. 

Now cut the dough diagonally at one end- to form a triangle. The ends are always a little scraggly- those are my taste testers once baked. But continue cutting diagonally one way, then the other to make triangle scones all the way across. Place the scones on the tray- a few inches apart. 

Now melt your remaining 1/2 tbs of butter in the microwave for 15 seconds. Using the pastry brush- brush the tops of the scones with melted butter. And if you feel like sprinkling with a tsp of sugar- go for it! Otherwise place in the oven for 18-22 minutes or until edges are golden. Remove and cool for 5 minutes and then brush with the glaze if you're using it. 

To make the glaze: just add the lemon juice and the confectioners sugar to a bowl and whisk until sugar dissolves. I like to glaze the scones while still warm because I like it to melt into the scone. You might prefer to wait until it's cooled completely so you can see the glaze on top. It's up to you! I have no patience and want to eat them warm- so that's what I did. 

This are so dang good! Definitely give it a whirl! Xo

Charlie also agrees: 


Wednesday, August 13, 2014

Rainy Day Bolognese Sauce

Rainy Days, even in the summer, call for comfort food. Pasta, of course, is the first thing that comes to my mind. And Bolognese sauce is very easy and delicious. And although it takes time, you can make a giant batch and freeze half for another meal. Best yet- it gains flavor every day of leftovers. Bolognese is a great comfort food- whether you have it over pasta, zucchini noodles, throw it on a hoagie for a sloppy joe- it's an all around feel good meal. 


Bolognese Sauce 

Fridge:
1 1/4 lbs ground beef (85/15) 
1 lb of meatloaf mix- usually a mix of veal, pork and beef
1 tbs italian parsley, minced 
2 cups mushrooms, sliced- I used baby bellas- but use what you prefer 

Counter:
5 garlic cloves, minced
2 cups chopped vine ripe tomatoes (appreoximately- more or less is fine) 
1 large yellow onion, minced 
6 small basil leaves, minced
1/4 cup red wine (optional) 

Pantry:
2 1/2 tsp dried oregano (fresh is fine also)
2 tbs tomato paste 
2 tsp salt 
1 tsp black pepper
Couple small pinches red chili flakes (optional) 
1- 28 oz can whole peeled tomatoes (I like San Marzano) 
1- 26.5 oz strained (puréed) tomatoes- I use Pomí brand- it's in a box 
1- 26.5 oz chopped tomatoes- also Pomí brand. (You can sub 2 cups of fresh tomatoes for this) 
2 tbs olive oil 

Tools:
Massive oven proof pot with lid- Le Crueset Dutch oven works great 
Cutting board 
Chopping knife
Measuring cups/spoons 
Wooden spoon 
Potato masher 

Preheat oven to 300. 

Heat the olive oil in the Dutch oven over medium to high heat. Once oil it hot add the onions and allow to cook for a few minutes. Then add the garlic and cook for a minute or two. Add the tomato paste and cook for a minute, while stirring. Next add the mushrooms. The kids don't like mushrooms so I really minced mine up- to add the flavor but without them saying, "what is that?". Cook the mushrooms for a minute or two. 
At this point, add the ground meats and sprinkle with a large pinch of salt. Cook for about 5 minutes or so while stirring a couple times. The meat doesn't have to be completely cooked through at this point. Add the red wine, if using, and cook for a minute or two, stirring occasionally. 
Now add the whole peeled tomaotes, juice and everything. Use your potato masher and mush the tomatoes up. Then add the puréed tomatoes, the diced tomatoes and the freshly chopped tomatoes. Bring to a simmer. 
Now it's time to add your seasonings: basil, oregano, italian parsley, red chili flakes (if using), 2 tsp salt and 1 tsp black pepper. 
Mix everything together and bring to a simmer. Place the lid on top and place the Dutch oven pot into the oven. 

Bake for at least 2 hours. I baked mine for 3 just because I was home. I stirred it about 3 times during this time. So once an hour is good. 

Serve it however you want to enjoy it. I have now eaten two servings of pasta and meat sauce. Oh yea!! Its some good stuff. Xo


Princess Alllie enjoying her penne Bolognese:


Tuesday, August 12, 2014

The Quintessential Summer Salad

I made this salad for a beach BBQ (thank you Swansons!) this past weekend and the entire party gave me two thumbs up to blog about it. Like I've said in the past, I'm more of a cheeseburger gal than a salad girl but I will say that there is something about salads that have a lot going on that really does make me happy. This salad is super healthy and really does hit the spot. This was only a side at the party but it is definitely a meal all on it's own. I think if I make it again- I'll eat it with some simply grilled shrimp and I'll be beyond content. Move over cheeseburgers...salads are taking over. 


The Quintessential Summer Salad 

Fridge:
1 bag of arugula 
1 medium red pepper, diced small
1 medium zucchini, julienned 
2 medium carrots, julienned
2 corn on the cobs, corn cooked and kernels cut off and cooled 
Four stalks of celery, cleaned and sliced thin 

*I used about 1 1/2 to 2 cups of each vegetable above 

Freezer:
2 cups of edamame, boiled for 5 mins and cooled 

Counter:
2 lemons 
1/2 medium red onion, sliced very thin 
2 cups water 

Pantry:
1 cup quinoa (I used tricolor) 
1/2 tsp salt
1/2 tsp black pepper 
6 tablespoons olive oil 

Tools:
Large salad bowl 
Medium pot with lid
Small mixing bowl
Whisk or fork 

Add two cups of water and a pinch of salt to the pot. Bring to a boil and add the quinoa. Turn the stove down to low and put the lid on. Cook for 10-15 mins until all the water is absorbed. Remove lid and allow to cool. I placed mine in the freezer to speed up the process- and just stirred it every 5 mins for about 25 minutes. Or you can just use 2 cups of leftover quinoa for the salad. 

Add the arugula to the large salad bowl. Then I added the quinoa, red peppers, carrots, celery, red onions, zucchini and corn and edamame. 

In the small mixing bowl add the juice of 2 lemons, salt, pepper and whisk in the olive oil. Mix well and drizzle this over the salad just before serving. 

This salad feeds a crowd or you can use the dressing on the side and keep it in the fridge in Tupperware undressed for a few days. It's really a delicious salad and really healthy! This fed about 10 people as a side- it makes a lot so adjust accordingly. Hope you enjoy it! Xo


Sunday, August 10, 2014

Sunday Funday: Poptails

Have you ever been to a party that goes a little bit past it's expiration date? Over the 4th of July I had this experience and I knew it was time to head home when people started mixing whatever liquors were leftover on the counter to take shots. As someone who detests shots, this was about the time that "closing time" began to play in my head. 

Parties also seem to hit their expiration date when the ice runs out. You cannot have a cocktail in the summer (especially in North Carolina where this 4th party took place) without ice. It's just not happening. So when I went to get ice for my drink and there was not a cube to be found- I knew it was time to go. But right at this moment- this girl ran past me to the freezer and I told her there's no more ice- she goes "it's ok, I'll use a Popsicle". Desperate times call for desperate measures. But this led me to this idea...why not use a popsicle to chill your drink and better yet, a way to flavor a drink?! People make flavored ice cubes all the time but a Popsicle is more fun and brings you back to your good ol' childhood days. 

So this is your Sunday Funday mission. Make these poptails or prosecco pops or whatever you want to call them. I happily taste tested them for you and they're delicous! 


Poptails aka Prosecco Pops 

Fridge:
1 bottle of prosecco
1/2 pint of raspberries (1 cup or 6 oz) 
2 peaches, peeled, pitted and roughly chopped 

Counter:
1/2 cup of water 

Pantry:
1 tsp of sugar 

Tools: 
Blender 
Popsicle molds 
Popsicle sticks- I used our family chopsticks 
Champagne flutes 
Measuring cups/spoons 
Peeler 
Cutting board 
Chopping knife 

Add the rapsberries, 1/4 cup of water, and 1 tsp of sugar to the blender.
Process until puréed. Pour this into your popsicle mold but only filling 1/3 or just under half way up. I just divided what I had evenly among my 4 molds (my Popsicle mold makes 8 single stick pops or 4 double stick pops- I purchased it at Bed, Bath & Beyond this week). 

Freeze this half of the popsicle for about 1 1/2 to 2 hours. I added my sticks at this point so they would be centered. 

Rinse the blender out and add the peaches and remaining 1/4 cup of water. Purée this and pour over the frozen raspberry. Place the popsicles back into the freezer and freeze for another 2-3 hours.

I know this takes patience but it's worth it! 

Once the popsicles are frozen, remove
them by running the mold under warm water. Pour a glass of prosecco and add the popsicle. It keeps your prosecco cold and melts into a perfect Bellini! Yay Sunday Funday!! 

And for kids- just use sparkling cider!! Or just let them eat the healthy Popsicles as is! Xo


PS- next poptail test is lime popsicles for gin & tonics- who's in?!? 


Thursday, August 7, 2014

Panko Crusted Fish with Corn and Scallion Sauce

My awesome cousin/brother/friend/dude Jason Keen first made this dish during our families yearly trip to the Outer Banks. Don't tell anyone but I used to not like seafood that much. It wasn't until my early 20s that I finally decided to eat and try everything...and who'd have thunk it, but I now love and eat everything, seafood included. But this dish is by far one of my favorite fish dishes. It's simple yet completely satisfying in a feel good sorta way.

It's one of those dishes that bring back all those vacation memories for me. I miss those trips. And Dad I love you dearly but if you don't figure out a beach house for next year- the sisters and I are going down to North Carolina to meet our crazy Fijian relatives without you. Plus it will be so nice for Jason to cook this for me. It's like a sandwich- always tastes better when someone else makes it for you. 

Have I ranted on enough? Geez. Just make this fish dish. Trust me. It's scrumptious. 


Panko Crusted Fish with Corn and Scallion Sauce 

Fridge:
4 fillets of tilapia, or your white fish of choice
2 eggs 
2 cups heavy cream
3/4 cup of scallions, thinly chopped
1/4 cup grated Parmesan 
1/2 tbs butter 

Counter:
1/2 medium yellow onion, minced (about 1/2 cup)
2 garlic cloves, minced 
2 ears of corn, cooked and kernels cut off the cob*
Juice of 1/2 lemon 

Pantry:
1 1/4 cup of panko breadcrumbs 
1/2 cup of ap flour 
1/4 tsp salt plus more for seasoning fillets and the breading 
Few cracks of black pepper 
Few drops of hot sauce (optional)
Few tablespoons of olive oil 

Tools:
1 medium sauce pan 
1 large nonstick sauté pan 
Fish spatula or regular spatula 
2 plates
1 wide bowl 
Fork or whisk 
Measuring cups/spoons 
Tongs for breading if you don't want to use hands (I always use my hands) 
Plate lined with paper towels 

Melt the butter over medium to low heat in the saucepan. Once melted add the onions and garlic. Sauté for a few minutes. Once they have softened, add the corn kernels and the heavy cream. Allow this to simmer for 15 minutes until the cream begins to reduce and thicken. Then add the scallions, 1/4 tsp of salt and a few cracks of black pepper. At this point you can add the hotsauce if you're using it. Simmer for another few minutes and turn off the heat. Set aside while you cook the fish.

To bread the fish: on one plate add the flour with a good pinch of salt and pepper. Mix well. On the other plate, add the panko breadcrumbs and a good pinch of salt and pepper. Mix well.
In the wide mouthed bowl, add the 2 eggs and  whisk with a little salt and pepper. I know it seems like a lot of seasoning but it's worth it. 

Squeeze half of the lemon over the fish fillets and then sprinkle with salt and pepper. First place the fillet in the flour and cover well. Making sure to shake off the excess flour, transfer it to the egg bowl. Cover with the egg mixture and then allow excess to drip off into the bowl. Place the fillet into the panko breadcrumbs and cover completely, allowing breadcrumbs to stick all over the  fish. Continue this process with each fish fillet before cooking. 

Preheat the sauté pan with a few tablespoons of olive oil over medium to high heat. Once it's hot, add the breaded fish fillets. Cook for 2-4 minutes per side, depending on thickness of fillet. Once cooked, remove from pan and place on paper towel lined plate. Allow to cool for a minute before serving with the corn and scallion sauce. 

I served mine with grilled asparagus- a light accompaniment is good with the heavier sauce. Enjoy this! Pura vida! Xo


*To easily cook the corn: leave it in it's husk and microwave for 3 minutes per husk. Chop off the bottom end of the corn while still warm and push the corn out. Great time saver.


Wednesday, August 6, 2014

Light and Easy Quinoa Salad

A girlfriend of mine mentioned craving quinoa salad lately. It's definitely not on my cravings list- but no judgements. And since it was her birthday this past weekend I figured I'd make her a batch of a quinoa salad I've made a dozen times. It's really simple, healthy and the flavors mesh really well together. I really do enjoy it. But I definitely don't crave it. Cheeseburgers- yes, quinoa- not so much.

So this is for you Jimena! Happy Birthday! 


Light and Easy Quinoa Salad 

Fridge:
1 red bell pepper, small dice (almost 1 cup) 
1/2 cup scallions, thinly chopped 
3 tbs italian parsley, minced
1 cup celery, small dice

Counter:
3 cups of water 
Juice of 1 lemon 
1/2 small red onion, minced (about 1/3 of a cup)

Pantry:
1 1/2 cups quinoa
1/4 tsp salt
Few cracks of black pepper
3 tbs olive oil 
3/4 cup of dried cranberries (optional)

Tools:
Medium pot with lid 
Medium mixing bowl
Small mixing bowl 
Fork or whisk 
Mixing spoon
Cutting board
Chopping knife 
Measuring cups/spoons

Bring the 3 cups of water to a boil with a large pinch of salt in it. Once boiling, add the quinoa and turn heat down to low. Put a lid on it and allow to simmer and steam until all the water is absorbed. Remove the lid and fluff with a fork. Allow to sit for 5 minutes for steam to release. Then transfer to the medium mixing bowl and place in fridge for 15 minutes to cool or leave it on the counter until cooled. I usually make my quinoa the night before and leave it in the fridge until I'm ready to use. 

Once cooled, add the red peppers, celery, italian parsley, red onion, scallions and dried cranberries if you're using. I usually do use them but I was serving this salad with a fish dish so decided to leave it out. Sprinkle half of the salt and pepper over the quinoa and ingredients and mix well. 

Take the remaining salt and pepper and add to the small mixing bowl. Add the lemon juice and olive oil and whisk to combine. Pour the dressing over the quinoa salad. Mix well. 

Refrigerate until read to serve. Or just eat right away. It's delicious! Enjoy! Xo


Tuesday, August 5, 2014

Buttermilk Ranch Style Dressing

Lately I've been really good about eating salads. In the past I have never really been a salad person though. I'm the girl who has to add ten ingredients to a salad to make it edible, which probably defeats the purpose of the salad but hey- I like what I like.

One thing that helps with my salad intake is having a yummy dressing. I usually am lazy and just toss on some balsamic vinegar and olive oil. But this weekend I decided to get out of pajama mode and make my version of "ranch" dressing. Although mine isn't as thick as a typical ranch- I truly liked mine better. You can always adjust the level of buttermilk to allow for a more thicker dressing. 

Best part of this dressing was you can toss everything into a pint sized mason jar, give it a shake and it's done. No messes. And storage and mixing all in one- try it out. It's good stuff. 


Buttermilk Ranch Style Dressing 

Fridge: 
1 cup buttermilk
1/4 cup mayo
3 tbs sour cream
1 1/2 tsp Dijon mustard- I used whole grain
1 tbs dill, minced
1 tbs italian parsley, minced
1 tbs chives, minced 

Counter:
1 garlic clove, microplaned
1/2 tsp lemon zest 

Pantry: 
Few dashes hot sauce
1/4 tsp salt 
1/4 tsp black pepper 

Tools:
Pint sized mason jar with lid 

Combine all the ingredients in the mason jar. Put on the lid and shake well for 30 seconds. This dressing takes on a more full flavor after marinating for an hour. 

This dressing will keep for 3 to 4 days in the fridge. 

I tossed this dressing with sweet summer vine ripened tomatoes and boston bibb lettuce. It was perfection!! Bring on the vegetables! 


Monday, August 4, 2014

Zucchini and Oatmeal Muffins

Man, oh man- were these good!! I think I ate three right out of the oven. I burned my mouth and everything but it was so worth it.

I was lucky enough to get a giant (actually the smallest one of the garden) zucchini from friends and the kids and I decided to make zucchini muffins. We added some oatmeal for some extra healthiness and I personally would have added walnuts but this is a nut-free home. With or without nuts- these are amazingly delicious!! And zucchinis are springing up in gardens everywhere so find a green-thumbed friend and ask for one- they grow like crazy, so I'm sure they'll be happy to share! I'd say offer to send some muffins over but you'll probably finish them before that happens.


Zucchini and Oatmeal Muffins 

Fridge:
2 eggs

Counter:
2 medium or 1 large zucchini, grated. I had about 4 loosely packed cups of grated zucchini- more or less is fine! 

Pantry:
2 cups flour
2 tsp baking powder
1 tsp baking soda
1/2 tsp salt 
1/2 tsp ground ginger
1/2 tsp cinnamon 
2/3 cup brown sugar
1/4 cup white sugar
2/3 cup oatmeal- I had oatmeal and flax seed combo at home so I used this.
1 tsp vanilla extract 
1/2 cup canola oil
1/2 cup chopped walnuts (optional)
Canola oil spray 

Tools:
2 large mixing bowl
1 mixing spoons
Measuring cups/spoons
Box grater 
Muffin trays- this recipe made 18 so I used 2 trays

Preheat oven to 350. Grease muffin trays with canola oil spray.

In one large bowl add the zucchini, eggs, canola oil, and vanilla extract and mix well. 

In the other bowl add the remaining dry ingredients. Mix well. And then pour the dry ingredients into the other wet ingredient bowl. Mix well and pour the batter- 3/4 filled- into the greased muffin tray.

Bake at 350 for 22-26 minutes. Remove from oven and allow to cool before consuming- or risk burning your mouth like I did. Enjoy! 


Allie was super impressed by this zucchini! And couldn't wait to eat the muffins for breakfast. She's my little sous chef!! 


Charlie chowed down on his zucchini oatmeal muffin for breakfast!! He loves them!! Xo

Friday, August 1, 2014

When life hands you lemons...

Summertime is the season of lemonade stands. It's one of my favorite activities with the kids and they have as much fun making the lemonade as they do screaming to cars as they pass by- and hopefully stop. Lemonade stands are something I looked forward to when the warm weather began and it's a great pastime for all. This is the recipe we used for our homemade lemonade this week. Try it, add some vodka and mint if you're making it for grown ups. It's really delicous!


Homemade Lemonade

Freezer:
3 cups of ice 

Counter:
10 lemons, juiced- about 1 3/4 cup 
10 cups of cold water plus 2 extra cups for simple syrup 

Pantry:
1 3/4 cup of white sugar

Tools:
Gallon sized pitcher
Small pot 
Wooden mixing spoon 

In the pot add 2 cups of water and all the sugar. Bring to a boil and allow the sugar to dissolve. Once dissolved, turn off. 

Add the 3 cups of ice to the pitcher and pour the warm simple syrup into the pitcher. Mix until the ice melts. 

Pour the juice of the 10 lemons, about 1 3/4 cups of juice, into the pitcher. Add the extra 9 cups of cooled water. You should end up with almost a gallon of lemonade. 

You can always adjust the sugar and lemon juice to your desired sweet/tartness. This amount was perfect for us served over ice. And we almost completely sold out (well and the kids drank a lot) at the stand so I guess this recipe speaks for itself. 


The kids at their awesome lemonade stand this week!