Showing posts with label tomatoes. Show all posts

Wednesday, July 22, 2015

Mexican Street Corn Salad

Everywhere you turn these days there is a taco stand, a taco bar, a taco restaurant or a taco truck. And I am not complaining- bring on the tacos!! But one of my favorite things to order at these taco joints is the Mexican street corn on the cob. It is this delicious combo of mayo, cotija cheese and chili powder. I'm obsessed!! (Side note: do not order Mexican corn on the cob when on a first date- it's all sorts of embarrassing!) 

This weekend I decided to take the Mexican street corn OFF the cob and into a salad. The result was this delicious summer salad and it paired perfectly with these amazing grilled steaks my boyfriend made me on Sunday. Highly recommend this recipe- especially while corn is in season! 


Mexican Street Corn Salad 

Fridge:
1/2 cup scallions, thinly sliced
2 tbs cilantro, minced 
1 cup grape tomatoes, sliced in half
1/2 cup radishes, thinly sliced half moons
1/2 jalapeño, deseeded and minced- approx 2 tsp
1/4 cup mayonnaise 
1 cup cotija cheese, grated 

Counter:
6 fresh raw corn on cobs- kernels removed from the cob (approx 6-8 cups) 
Zest of half lime
2 1/2 tbs fresh lime juice 
1 garlic clove, minced 

Pantry:
1 1/2 tsp olive oil
3/4 tsp salt 
3/4 tsp chili powder 
Fresh pepper to taste 

Tools: 
Large mixing bowl
Small mixing bowl
Whisk
Medium sauté pan 
Wooden spoon 
Cutting board 
Chopping knife 
Measuring cups/spoons 

Heat the sauté pan over medium heat. Add the olive oil and when hot add the raw corn kernels. Cook for 10 to 15 minutes allowing the corn to get nice and toasty. You want color on some of the kernels. Add 1/4 tsp of salt and fresh pepper to taste and continue to cook, stirring every few minutes. Once they are cooked and some kernels are browned- remove from heat and allow to cool. 

In the small bowl mix together the lemon juice, lemon zest, garlic, chili powder, jalapeño, mayonnaise and 1/4 tsp of salt and pepper to taste. Whisk well and set aside to marinate for at least 20 minutes. The dressing can be made a day ahead to allow the flavors to intensify. 

In the large bowl mix together scallions, radishes, cotija cheese, grape tomatoes, cilantro, and cooled corn. Sprinkle with 1/4 tsp of salt and fresh pepper to taste. Pour the dressing on top of the salad and serve.

This makes a great side to a summer meal or you can put it on top of arugula and add some grilled steak or shrimp to make a healthy salad upgrade. Enjoy! Xo


Monday, December 15, 2014

Tomato and Herb Baked Eggs

I've been doing a lot of recipe testing for the opening of my restaurant in a month. Costa Rica here I come! And I love the ease, healthiness and lightness of this dish. It's a great make-ahead brunch item and it tastes delicious!! I highly recommend adding this to your holiday brunch menu! 


Tomato and Herb Baked Eggs 

Fridge:
6 eggs 
1 1/4 cups red pepper, diced (1 large pepper) 
1 tsp thyme, minced 
1/2 tsp rosemary, minced 
6 tbs ricotta cheese
6 tsp parmesan cheese, grated
3 tsp chives, sliced (optional) 

Counter:
2 cloves garlic, minced 
3/4 cup yellow onion, diced 

Pantry: 
1 (14.5 oz) can diced tomatoes, drained slightly (or 1 1/2 cups fresh tomatoes diced) 
2 tbs tomato paste
1 cup tomato sauce 
2 tsp oregano
1 tsp paprika 
1/4 tsp salt 
2 tbs olive oil 
Few cracks of black pepper 

Tools:
Medium pot
Wooden spoon 
Measuring cups/spoons
Cutting board
Chopping knife
6 ramekins or medium casserole dish 
Ladle 

Heat the pot over medium heat and add the olive oil. Once oil is hot- add onions, red peppers and garlic. Sauté for a 5-6 minutes and then add the tomato paste. Cook for a minute and then add the tomato sauce, diced tomatoes, thyme, rosemary, oregano, paprika, and 1/2 tsp salt. Turn heat down to low and simmer the sauce for 15-20 minutes, allowing the sauce to reduce and thicken, while stirring occasionally.

At this point you can turn off the heat and allow the sauce to cool. You can refrigerate this sauce for up to 5 days (or freeze it for a month).

Or remove from the heat and allow to cool slightly. Preheat your oven to 350 at this point. 

Using your ladle- pour about 1/2 cup of sauce into each ramekin or pour the entire pot of sauce into the casserole dish. 

Add 1 tbs of ricotta to where you plan to crack the egg. In the casserole dish- separate the dollops of ricotta every 3-4 inches. Crack one egg on top of each ricotta dollop and then sprinkle each egg with 1 tsp of grated parmesan and finish with 1/2 tsp of chives on top. Top with a little bit of freshly grated black pepper. 

Bake the ramekins or casserole dish for 12-15 minutes or until the whites of the eggs begin to set and turn white. If you want firmer eggs bake for another 5 minutes or broil for a minute. 

Remove from the oven and allow to cool slightly for 5 minutes. The eggs will continue to cook- which is why you take them out earlier than prefered. 

Enjoy this with a side salad or like I did with homefries, avocado and bacon. This is so good and so easy!! Perfect brunch meal!! Enjoy! Xo


Thursday, September 18, 2014

Pesto & Pasta

When I first started babysitting/nannying at the young age of 12, the family and kids I spent the next ten years watching were huge pasta lovers. The parents lived in Italy for four years and they brought their love of Italian food back to Connecticut. They started me on my obsessive love of pasta and definitely introduced me to pesto. The mother, Danielle, was a great cook and always made her sauces from scratch and then froze them for the kids and I. Her pesto sauce was one of my favorites! And even though I've evolved my pesto recipe over the years- I still think of her and her beautiful daughters when I make my pesto. Love you Leinroths!!

My pesto is light and so fresh. I definitely recommend doubling the recipe and freezing the leftovers. It adds such great flavors to pastas, meatballs, chicken, eggs- honestly anything!! Pesto makes the world a better place. 


Pesto

Fridge: 
1 1/2 cups basil,  packed
1/4 cup Parmesan cheese, grated
1/4 cup pine nuts 

Counter: 
3 tbs water 
1 large garlic clove, minced 
Juice of 1/2 lemon 

Pantry: 
Small pinch of red pepper flakes
1/2 cup olive oil 
Few cracks of fresh black pepper 
Salt- to taste. 

Tools: 
Blender or food processor 
Wooden spoon 

Add all the ingredients to the blender or food processor except the olive oil and salt. Turn on the machine and slowly drizzle in the olive oil. You might have to stop the machine a couple times to push down the leaves or scrape the sides. Taste the pesto and add salt if you feel it's necessary. A lot of the time the Parmesan is salty enough for it. 

Store in an air tight container- I use mason jars- in the fridge. This lasts a couple weeks in the fridge or a few months in the freezer. It's nice to freeze in an ice cube tray and just defrost a cube or two when you need it. 


Pesto Pasta with Veggies 

Premade:
1/2 cup pesto 

Fridge:
1 small yellow squash, sliced thin
2 large handfuls of baby spinach 

Counter: 
1 medium tomato, diced small
1 small yellow onion, thinly sliced

Pantry:
3/4 lb (12 oz) pasta of your choice- I used rigatoni 
1/2 tsp salt or to taste 
1/4 tsp fresh black pepper or to taste 
2 tsp olive oil

Reserve: 
1/4 cup pasta cooking water 

Tools: 
Large sauté pan
Large pot of boiling salted water 
Wooden spoon
Colander
Cutting board
Chopping knife
Measuring cups

Add the pasta to the boiling salted water. Cook for until almost al dente. Usually 8-10 minutes. Drain in the colander, making sure to reserve 1/4 cup of starchy water for the pasta sauce. 

While pasta cooks, hear the olive oil in the sauté pan over medium to high heat.
Add the onions and sauté for 3-5 minutes or until they have softened. Add the yellow squash and sauté for a minute before adding the two large handfuls of baby spinach. Pour the pasta water over the spinach to encourage cooking and add the pesto to the center of the sauté pan. Stir all the vegetables and pesto together. You can turn the heat down to medium low now. 

At this point the pasta should be ready. Pour the hot drained pasta into the sauté pan and mix well covering with the pesto and vegetables. Cook for a minute while still stirring and turn off the heat. Add the fresh tomatoes at the end and stir in. They will warm in the sauce but hold their shape. Add the salt and pepper to taste. 

Enjoy this! The kids loved it also! Allie thought the "green sauce" looked cool! Xo


Thursday, August 28, 2014

Farm Stand Gazpacho with Watermelon & Corn Relish

Summer is the season of watermelon, corn and tomatoes. This is usually the time of the year that I make a ton of recipes using these items. They are just perfectly ripe, sweet and delicious during the summer months and yes you can get them 12 months a year now but it's just not the same taste. So work these three ingredients into your life the next month or so because they'll be gone before you know it. 
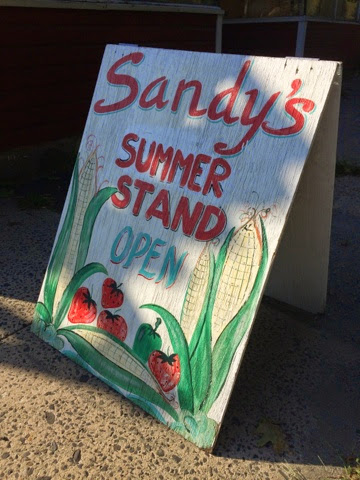
And luckily I have an amazing farm stand open every day just down the road from work. Sandy's Summer Stand in between Riverside and Cos Cob in Connecticut is the perfect place to grab fresh local summer produce. Go find your farmers market or local roadside stands and grab some summer delights!
And best yet- this gazpacho requires just some rough chopping and a blender. It's mindless cooking. And yet it's impressive and delicious as well. Perfect for a end of the summer dinner party- and if Charlie, a 15-month old, devours it- anyone will!! Try this one people!! 


Farm Stand Gazpacho with Watermelon & Corn Relish 

Fridge: 
1 small cucumber, peeled and roughly chopped 
1 small red pepper, deseeded and roughly chopped
4 stalks scallions, end removed and roughly chopped 

Counter:
3 large ripe tomatoes 
1/4 of medium red onion, roughly chopped 
4 garlic cloves

Pantry:
1/2 cup olive oil
2 tbs sherry vinegar
1 tsp salt
1/2 tsp black pepper 
1/4 tsp cumin 

Tools:
Blender or food processor
Large bowl
Mixing spoon
Measuring cups/spoons
Cutting board
Chopping knife
Peeler 
Plastic wrap

Take all the ingredients and add them to the large bowl. Cover with plastic wrap and marinate for 2-4 hours or overnight if you prefer. 

After the ingredients have marinated, add them in batches to your blender or food processor and blend or pulse until desired consistency is reached. I like mine slightly chunky. If you prefer completely smooth- you can run it through a sieve or chinoise post processing. 

Once processed, add it to a Tupperware and refrigerate for a few hours. I like to do this part overnight to allow the flavors to really meld. Gazpacho is always best a day or two after it's made. 


Watermelon & Corn Relish

Fridge:
1 1/2 cups watermelon, diced small
Cooked and cooled corn removed from 1 ear of corn
6 leaves of basil, julienned 

Pantry:
Pinch of salt
Crack of black pepper

Tools:
Medium mixing bowl
Mixing spoon 
Cutting board
Chopping knife
Measuring cups

Add all the ingredients to the bowl and mix. Place a tablespoon or two in the center of the chilled soup for serving. 

It's a great balance of the zestiness of the gazpacho and the sweetness of the watermelon, basil and corn. 

I just love this recipe, it's so delicious and simple to make! Enjoy it! Xo


Summer farm stands are the best!! I got every ingredient (minus the seasonings) from this stand. Bonus- one trip shopping! 


Wednesday, August 13, 2014

Rainy Day Bolognese Sauce

Rainy Days, even in the summer, call for comfort food. Pasta, of course, is the first thing that comes to my mind. And Bolognese sauce is very easy and delicious. And although it takes time, you can make a giant batch and freeze half for another meal. Best yet- it gains flavor every day of leftovers. Bolognese is a great comfort food- whether you have it over pasta, zucchini noodles, throw it on a hoagie for a sloppy joe- it's an all around feel good meal. 


Bolognese Sauce 

Fridge:
1 1/4 lbs ground beef (85/15) 
1 lb of meatloaf mix- usually a mix of veal, pork and beef
1 tbs italian parsley, minced 
2 cups mushrooms, sliced- I used baby bellas- but use what you prefer 

Counter:
5 garlic cloves, minced
2 cups chopped vine ripe tomatoes (appreoximately- more or less is fine) 
1 large yellow onion, minced 
6 small basil leaves, minced
1/4 cup red wine (optional) 

Pantry:
2 1/2 tsp dried oregano (fresh is fine also)
2 tbs tomato paste 
2 tsp salt 
1 tsp black pepper
Couple small pinches red chili flakes (optional) 
1- 28 oz can whole peeled tomatoes (I like San Marzano) 
1- 26.5 oz strained (puréed) tomatoes- I use Pomí brand- it's in a box 
1- 26.5 oz chopped tomatoes- also Pomí brand. (You can sub 2 cups of fresh tomatoes for this) 
2 tbs olive oil 

Tools:
Massive oven proof pot with lid- Le Crueset Dutch oven works great 
Cutting board 
Chopping knife
Measuring cups/spoons 
Wooden spoon 
Potato masher 

Preheat oven to 300. 

Heat the olive oil in the Dutch oven over medium to high heat. Once oil it hot add the onions and allow to cook for a few minutes. Then add the garlic and cook for a minute or two. Add the tomato paste and cook for a minute, while stirring. Next add the mushrooms. The kids don't like mushrooms so I really minced mine up- to add the flavor but without them saying, "what is that?". Cook the mushrooms for a minute or two. 
At this point, add the ground meats and sprinkle with a large pinch of salt. Cook for about 5 minutes or so while stirring a couple times. The meat doesn't have to be completely cooked through at this point. Add the red wine, if using, and cook for a minute or two, stirring occasionally. 
Now add the whole peeled tomaotes, juice and everything. Use your potato masher and mush the tomatoes up. Then add the puréed tomatoes, the diced tomatoes and the freshly chopped tomatoes. Bring to a simmer. 
Now it's time to add your seasonings: basil, oregano, italian parsley, red chili flakes (if using), 2 tsp salt and 1 tsp black pepper. 
Mix everything together and bring to a simmer. Place the lid on top and place the Dutch oven pot into the oven. 

Bake for at least 2 hours. I baked mine for 3 just because I was home. I stirred it about 3 times during this time. So once an hour is good. 

Serve it however you want to enjoy it. I have now eaten two servings of pasta and meat sauce. Oh yea!! Its some good stuff. Xo


Princess Alllie enjoying her penne Bolognese:


Friday, July 25, 2014

Tomato and Feta Orzo Salad

This salad is so simple and a great addition to meals. I love it in the summer time! Easy, quick and delicious. It's also a great dish to bring to a picnic or potluck. I make a big amount and snack on it all week! 


Tomato and Feta Orzo Salad

Fridge:
3/4 cup of crumbled feta
2 handfuls of baby arugula 

Counter:
1 pint of grape tomatoes, halved
1 jar of sundried tomatoes in oil, julienned
Juice of 1 lemon  

Pantry:
1 lb box orzo 
2 tablespoons olive oil 
1 tsp salt
1 tsp black pepper 

Tools:
Pot of boiling, salted water
Sieve 
Large mixing bowl
Small mixing bowl
Whisk or fork 
Wooden spoon
Measuring cups/spoons
Cutting board
Chopping knife 

Pour the box of orzo into the boiling salted water. Boil for 8-10 minutes until Al dente. Drain and cool. I was impatient so I cooled mine under cold water. Normally with pasta- this is a no-no bc the starch on the pasta helps dressing/sauces stick. But with this salad- I always do it bc I usually want to eat it right away. 

Add the cooled orzo to the large mixing bowl with the arugula, feta, sundried and grape tomatoes and sprinkle with 1/2 tsp of salt and 1/2 tsp of black pepper. 

In the small mixing bowl add the lemon juice, olive oil and remaining 1/2 tsp of salt and 1/2 tsp of black pepper. Whisk together and pour over the salad. Mix dressing into the salad and enjoy! 

I polished off my kale and corn quiche with this salad yesterday. It was de-li-cous!! This really is a great and super easy recipe to have in your back pocket. Hope you love it as much as I do! Xo


Monday, July 21, 2014

Oh Monday Morning

Monday mornings require a little extra oomph. I usually wake up excited to start my week or (and more often) wanting to hit my snooze button. My cure for the weekend exhaustion is a giant cup of green tea and something amazing for breakfast. 

This breakfast taco requires a little more time but it's usually something I make when I have leftover potatoes and other dinner leftovers that I can throw into them. Tortillas are essentially the vehicle that carry leftovers into my mouth. I use them constantly. I have a minor obsession with burritos and tacos. They're just so versatile!! 

Here is my latest breakfast taco: 


Breakfast Tacos

Fridge: 
4 eggs 
1/2 tbs cilantro minced
1/4 cup shredded cheese- your choice I used sharp cheddar
8 bacon slices, cooked 
4 tsp sour cream 

Counter:
2 medium potatoes, diced and par boiled 
1/2 cup tomatoes, diced
1/4 cup onion, diced 
1 avocado, sliced
4 large tortillas 

Pantry:
1/2 tsp of paprika 
Few drops hot sauce
1 tsp salt
1/2 tsp black pepper
2 tablespoons oil

Salsa (optional) 

Tools: 
2 nonstick sauté pans
1 small mixing bowl
2 wooden spoons 
Whisk or fork 

Heat one sauté pan with 1 tablespoon of oil. Add the onions and sauté for a minute before adding the diced potatoes.  Sauté for a few more minutes, turning with a wooden spoon. Then toss in the tomatoes. Sprinkle with 1/2 tsp of salt and 1/2 tsp of paprika. Cook for another 3-5 minutes and set aside to cool. 

Heat the remaining 1 tablespoon of oil in the clean pan over medium to low heat. In the mixing bowl crack the four eggs, add the cilantro, 1/2 tsp of salt, 1/2 tsp of pepper and a few drops of hot sauce. Whisk together well. Add to the warm pan and using the wooden spoon, constantly move the eggs around until
they are just set. Turn off the heat and cook for another 30 seconds. 

Microwave the tortillas for 10-15 seconds to make them more pliable. Take one tortilla and spread 1 tsp of sour cream across the middle. Add 1/4 of the scrambled egg mixture and top of with a 1/4 of the shredded cheese. Add some of the potatoes, a couple slices of bacon and a few pieces of avocado. Continue this process with the other three tortillas.

If using salsa- add a couple spoonfuls and then wrap that tortilla up and chow down! It's delicious!! Yay Mondays!! 


Friday, July 18, 2014

Garden Veggie Pasta


I'm a total pasta junkie. No lie- I eat pasta  3 or 4 (maybe 5 or 6) times a week. I love carbs- what can I say? If you need to carb load- call me. 
And thankfully my sister has a very green thumb so I get a lot of garden fresh vegetables to toss with my carb heavy diet. And summer vegetables tossed with pasta is THE BEST! 
The simplicity of taking whatever you have in your garden and combining it with an herb and a little Parmesan and pasta water is what makes this meal. There's no stress- you don't need to measure anything. Just chop up some vegetables- whatever is lying around- and sauté it with some garlic, onion if you have it and take a ladle filled with the starchy pasta water- and you've got a meal!! Easy. I finish mine with Parmesan and I usually throw in some basil, italian parsley or even mint- and it's done. It takes 15 minutes. 5 mins to rough chop. 8 mins to sauté and 11 minutes for pasta to boil. It couldn't be more simple! 
I took garlic, red onion, zucchini, tomatoes, and basil and tossed with the pasta water. I added the al dente cooked pasta into the pan to finish cooking the pasta in the "sauce" and sprinkled on some (ok, a lot- what? I'm also a cheese junkie) Parmesan. And let me tell you- it was marvelous. 

AND better yet- the kids loved it the next day!! Yay!