Showing posts with label soup. Show all posts

Tuesday, November 17, 2015

Chunky Clam Chowder

Clam chowder has always been a favorite of mine. Even as a child when I ate around the clams and only ate the potatoes- it was still my second favorite soup (after my grandmothers cream of asparagus). This clam chowder has a lot going on- I like to add a bunch of vegetables and bacon to add texture and flavor. This is definitely not your traditional chowder- but I will say that my boss and boyfriend both said it's the best clam chowder they have EVER had- so screw tradition! 

And although this soup is great for a chilly night, it is also fancy enough for a dinner party. And you can make it a few days ahead- allowing the flavors time to meld. Perfection!! 


Chunky Clam Chowder 

Fridge:
3/4 lb thick cut bacon, 5/6 strips minced 
1 tbs butter 
2 cups leeks, thinly sliced and cleaned
1 cup carrots thinly sliced or diced small
3/4 cup red pepper, diced small 
1 cup corn, off cob or frozen 
1 tsp thyme, minced 
1 tsp parsley, minced 
2 cups heavy cream
2 cups whole milk 
1 1/2 cups light milk 
1 cup clam juice (8 oz jar) 

Counter: 
1 cup yellow onion, minced
2 garlic cloves, minced 
2 cups red potatoes, diced, skin on 

Pantry:
2 bay leaves 
3 tbs flour 
1 cup chicken broth 
1/2 tsp old bay seasoning 
4 (6.5 oz) cans of minced or chopped clams, not drained 
1/2 tbs olive oil 
1 1/2 tsp salt 
Fresh pepper to taste

Tools:
Large pot or Dutch oven 
Wooden spoon 
Slotted spoon 
Measuring cups/spoons
Cutting board 
Chopping knife 

Heat butter and olive oil in soup pot over medium to high heat. Once hot add your diced bacon. Cook bacon until desired consistency. I like mine super crisp. Remove 2/3 of the bacon with the slotted spoon and leave 1/3 in the pan. This does not have to be exact. Turn heat on stove to medium. Do not drain oil. 

Add the leeks, onions and garlic to the remaining bacon and oil. Cook for 5 minutes- stirring every minute or so. Add the red pepper, carrots, minced thyme, and 1/2 tsp of salt to the pot. Cook for another 5 minutes, stirring occasionally. 
Now add the 3 tbs of flour to the pot. Stir constantly. Cook flour and vegetable mixture for a few more minutes. 

Add the diced potatoes to the pot and sprinkle with 1/2 tsp of salt. Mix everything together and then add the liquids. Add the heavy cream, whole and light milk, chicken broth and clam juice. Stir and bring to a simmer. Add two bay leaves, 1/2 tsp of salt, pepper to taste and old bay seasoning. Keep the heat at a level that it's simmering and not boiling. 

Simmer for 10-15 minutes before adding the 4 cans of chopped or minced (your preference of size, I used 2 of each) with all their liquids. Add the parsley and bacon you removed earlier- reserving some for garnish if you like-  and cook for another 15 minutes. 

Remove from heat and allow to cool slightly before serving. Or cool completely and put into the fridge- this lasts a week in the fridge. Reheat on the stovetop when ready to serve. Enjoy! Xo





Friday, October 9, 2015

Tom Kha Kai aka Coconut Chicken Soup

It is about the time when I have to pack up my flip flops and break out my sweaters, which is seriously depressing for me but the yogi in me is trying to stay positive so on the flipside it's soup, stew and casserole season- yay! There are a lot of feel good, heart warming meals ahead of me and this soup is a super simple and flavorful way to start the season. 

Tom kha kai (also spelled tom kha gai) is a Thai soup traditionally made with lime juice, coconut milk, mushrooms and chicken. It's one of those soups that seems complicated but once you make it and realize how simple it is- you'll make it all the time. And all the delicious ingredients have such a complex flavor profile- it's a very impressive soup to serve at a dinner party. My version strays from the traditional slightly- with my addition of bok choy and corn- but I like the added textures. Play around with this soup base and see where you land. It's a fall and winter winner for sure! 


Tom Kha Kai 

Fridge:
1lb of boneless chicken breast, thinly sliced 
2 1/2 cups mushrooms, sliced (your choice of mushrooms- I used cremini and shiitake) 
2 1/2 cups bok choy, roughly chopped
1/2 cup scallions, thinly sliced 
1 tbs deseeded jalapeño, minced 
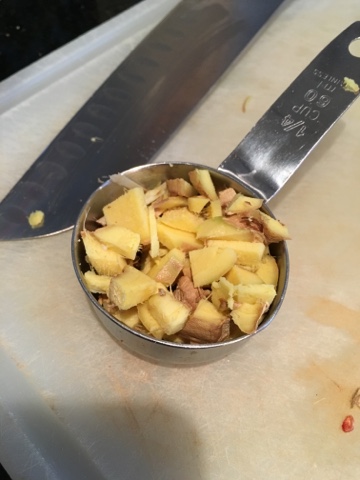
2 tbs fresh ginger, roughly chopped 
2 lemongrass stems
1 1/2 tbs cilantro, minced
1/2 cup fresh or frozen corn (optional) 

Counter:
1 cup water 
1/3 cup yellow onion, minced (about half a small onion) 
1 garlic clove, smashed 
Zest of 2 limes 
Juice of 1 lime (about 3 tbs) 

Pantry: 
4 cups chicken stock 
2 cans (14 oz) coconut milk 
2 tsp fish sauce 
1 tbs coconut oil 
1/4 tsp salt plus a little extra pinch 
Fresh pepper to taste
1/2 tsp sriracha sauce (optional) 

Tools:
Two medium pots 
Sieve
Cutting board 
Chopping knife 
Measuring cups spoons 
Wooden spoon
Ladle 

Place the lemongrass on your cutting board and using the backside of your chopping knife, repeatedly hit up and down the length of the lemongrass. This is essentially bruising the root and allowing the oils to be freed. Add the entire stalks, chicken stock, water, garlic, ginger, lime zest and lime juice to one pot. Place on the stove over medium to low heat and bring to a simmer. Continue simmering for 20 minutes and then remove from the heat. Set this pot aside until ready to use. 

In separate medium pot, add the coconut oil and heat over medium to high heat. Once hot- add the minced onions and jalapeños. Sauté for a few minutes until the onions become translucent. Sprinkle the chicken slices with salt and pepper (to your taste) and then add to the pot. Sauté until the chicken is completely white. Add the mushrooms, bok choy and corn if you're using it. Sauté for another few minutes or until the mushrooms are al-dente. 

Place the sieve over the pot with the chicken and mushrooms. Pour the flavored stock pot into the chicken and mushrooms pot, straining out the lemongrass and other flavorings. Bring the soup pot to a simmer. Then add the scallions and cilantro. Simmer for another 5 to 10 minutes before adding the two cans of coconut milk and fish sauce. Add 1/4 tsp of salt, sriracha if you're using it and pepper to taste. Bring to a simmer and then turn off. You can serve this now or allow it to cool and refrigerate it to serve the next day. 

I like to allow my Thai flavors to meld but sometimes I'm too impatient to wait. Hopefully this soup makes up for the cold weather ahead of us!! Enjoy! Xo


My Asian grocer had run out of bok choy so she gave me "emperor lettuce" as a substitute. I usually use bok choy though.


Thursday, September 24, 2015

Summer Corn, Roasted Butternut Squash & Mushroom Bisque

It's the end of summer corn and I'm using whatever corn I can find to my full advantage. Summer is (ugh) officially over. This is where I would insert a sad face emoji but I don't emoticon. But if you're lucky- your farmers market or local store probably has a few more ears of sweet corn to get rid of- and this soup is a beautiful and delicious way to use it up. The addition of the butternut squash and mushrooms make it a great transition from summer to fall. If you're in the mood for soup on these now cooler nights- I highly recommend trying this bisque out. It's simple and has great flavor. My boyfriend said this might be his favorite recipe of mine- besides my Jalapeño Eggs Benedict. So don't take my word for it- take his. 


Sweet Corn, Roasted Butternut Squash & Mushroom Bisque 

Fridge:
1 lb peeled and cubed butternut squash (I cheat and buy it ready to go) 
1/3 lb cubed pancetta (about 1 cup- you can also buy this pre-cubed) 
2 cups of sliced mushrooms- your choice. I used a mix of cremini, white button, oyster, and shiitake. 
1/2 cup milk 
1/2 cup heavy cream 
1 tsp thyme, minced 

Counter:
3 corn on the cobs, still in husks
1 medium yellow onion minced (about 1 1/4 cups) 
3 garlic cloves, minced 

Pantry:
3/4 cup chicken broth plus 1/2 cup 
1/2 tbs curry powder
1 tsp turmeric powder 
1/4 tsp cumin powder
1 tsp salt
Fresh pepper to taste 
1/2 tbs olive oil plus 1 tsp 

Tools:
1 baking tray 
1 large pot 
Medium mixing bowl 
Blender
Measuring cups/spoons
Chopping knife
Cutting board 

Preheat oven to 350 degrees. Add the butternut squash, olive oil, cumin and 1/4 tsp of salt and pepper to your taste to the bowl. Mix well. Pour onto baking tray and spread flat. Put tray into the preheated oven and bake for 35-45 minutes (depending on how large cubes are) or until the squash is fork tender. 

Once butternut squash is in oven- add the three corn on the cobs, still in the husks and roast them for 20 minutes. Remove them. Allow to cool and remove husks. Cut the corn off the cob and set aside. 

Once you have removed the butternut squash- add it to the blender with milk, heavy cream and 1/2 cup of chicken broth. I like to pulse mine to keep it a little chunky but process these items to your preference. 

Heat the large pot over medium heat. Add 1 tsp of olive oil and once hot- add the pancetta cubes. Cook for 6-8 minutes or until the pancetta gets a little crispy. Add the onions and garlic to the pot and sauté for a minute or two. Add the curry powder and turmeric powder and sauté for another 30 seconds. Then add the mushrooms and corn. Sauté everything together for 5 minutes and then add the fresh thyme. Stir together and add the remaining 3/4 cup of chicken broth. Bring to a simmer and add remaining 3/4 tsp of salt and fresh pepper to your taste. 

Pour the butternut squash mixture into the pot with the rest of the ingredients. Summer everything together over low heat for 20 minutes. This soup is very thick- so add milk or broth if you prefer it thinner. 

Allow to cool for a few minutes before serving. Enjoy the soup with a sprinkle of minced cilantro on top or with some crusty garlic bread or croutons. Yum! Xo 


Friday, November 21, 2014

French Onion Soup

I LOVE french onion soup. It's one of my always order items when it's on a menu. Even in the dead heat of summer- I'll order french onion soup if a restaurant will make it for me. It makes me happy. But for some reason I always avoided making it because I thought it would be an undertaking. But in reality- it's really simple (minus bawling while cutting onions) and delicious. And it can be dressed up for a party or enjoyed in pajamas while watching Scandal. And it can be made a few days ahead and tastes even better! This is a great fall/winter comfort meal! 


French Onion Soup

Fridge: 
3/4 cup apple cider 
2 large sprigs thyme (approx 3/4 tbs) 
2 tbs butter 

Counter:
6 1/2 cups yellow onions, thinly sliced 
2 garlic cloves, minced 
1/3 cup dry white wine 
1/2 cup apples, peeled and grated (I used a small Granny Smith) 

Pantry:
4 cups beef stock
2 1/2 cups chicken stock 
2 bay leaves 
1 1/2 tsp salt
1/4 tsp black pepper 

Optional topping:
Rustic bread, I used Portuguese 
Swiss cheese of your choice- Gruyere, Emmental, jarlsberg- whatever. 

Tools:
Large dutch oven with lid
Wooden spoon 
Cutting board
Chopping knife 
Measuring cups/spoons 
Box grater 

Melt butter over medium to low heat in the dutch oven pot. Once melted add your onions and 3/4 tsp of salt- stir and then allow to sit for 10 minutes to begin to sweat. Add your minced garlic and stir in. Continue to allow the onions to sweat and caramelized, only stirring every five minutes or so. The onions should reduce in size by half and they should begin to become a dark golden brown. Be careful to not burn the edges as this can result in a burned taste in the soup. Turn heat lower if this begins to happen. Just allow the onions to slowly caramelized- the whole process can take between 30-45 minutes. 

Once onions have caramelized, preheat your oven to 325 degrees. Add the white wine to the pot and allow to simmer for a few minutes and reduce. Then add the apple juice, both chicken and beef stock, thyme, bay leaves and remaining 3/4 tsp salt and 1/4 tsp of black pepper. Bring the soup to a simmer and then cover with the lid and place in the oven. Cook for 1 hour in the oven. 

Remove soup from the oven and allow to cool for 10 minutes before tasting and seasoning to your preference. 

To serve: I lightly toast my bread and then you have two choices. Sometimes I prefer to eat the soup with couton style bread to avoid the stringy cheese dripping bites. And sometimes I like the stringy cheese drippy bites and use a full slice of bread. Once bread is lightly toasted you can cut it into cubes for crouton style and place on a lined baking sheet. Grate your Swiss cheese over the bread cubes and broil for a few minutes on high- checking frequently to avoid burning. 

OR you can fill a oven proof soup bowl with soup and place a lightly toasted piece of rustic bread on top with either a slice of Swiss cheese or grate cheese all over it- typically a lot of cheese! Place under a high broiler and broil for a couple minutes while cheese melts, gets bubbly and golden brown. This results in the stringy drippy cheese. Both versions are delicious- one just makes for more civilized eating. Enjoy it! Xo


Crouton and more civilized eating version

Stringy drippy more cheesy version

Monday, November 10, 2014

Vegan Butternut Squash Soup

Fall is definitely the beginning of the soup and stew season. And butternut squash soup is always top of the list at my house. The reason I love butternut squash soup is that it's the easiest soup to make. It's really just throwing a few things in the pot, putting a lid on it and then blending it at the end. And it's always delicious. You really can't go wrong with it. You can dress it up for dinner parties or enjoy it in your pjs.


Vegan Butternut Squash Soup 

Fridge:
2-2 1/2 lbs butternut squash, peeled and cut into 1-2 inch cubes

Counter:
Approx 4 1/2 cups of water (enough to cover the vegetables 3/4 of the way up)
2/3 cup apples, peeled and cubed 
2/3 cup yellow onions, small dice 

Pantry:
1/4 tsp ground cinnamon
Pinch of nutmeg
1 1/4 tsp salt
Few cracks of black pepper

Optional topping:
Pomegranate seeds 
Sunflower seeds

Tools:
Medium pot with lid
Blender or food processor 
Cutting board
Chopping knife
Measuring cups/spoons 

Throw all the ingredients in the pot and cover 3/4 of the way up with water. I used about 4 1/2-3/4 cups in my pot. Cover with the lid and place over medium to low heat. The vegetables/fruit will simmer and steam at the same time. 

Simmer for 25-30 minutes until butternut squash is soft and beginning to fall apart. 

Ladle the entire pot into a blender (I had to do mine in two batches) and pulse until desired consistency is reached. I prefer mine completely smooth and then I add texture with the pomegranate seeds and sunflower seeds. 

At this point you can add 1/2 cup of light cream if you want a creamier soup but I wanted to keep this version vegan. Now how simple is that soup?!? Xo

Everything in the pot!


Thursday, October 2, 2014

Jazzed Up Ramen

Dreary autumn days call for soups and stews. And since ramen is no longer the food of starving college kids, I've decided to share my jazzed up version of ramen. 

This is definitely a childhood favorite of mine and reminds me of when I would stay home sick from school and make my own homemade chicken noodle soup using ramen packets as my noodles. 

I made this particular version spicy so it's not very kid-friendly but if you swap out the spicy ramen for chicken flavored- you've got a delicious meal for the kids. And the long noodles are fun for them to eat!! 

Plus it's a quick and easy meal for the days when you're at a loss of what to make and have little time- keep a few ramen packets around and jazz them up for the kids! 


Jazzed Up Ramen 

Fridge:
1/3 lb firm tofu, cut into cubes (about 1 1/2 cups) 
1/2 cup mushrooms (your choice), sliced
1/2 cup scallions, sliced thin 
2 tbs cilantro, minced 
1/2 tbs ketchup 
1 egg 

Counter:
6 cups water
Juice 1/2 lime 

Pantry:
1 chicken flavored ramen packet 
1 spicy flavored ramen packet (see photo) 
2 tsp soy sauce
1/2 tsp sesame oil
1 1/2 tsp Wostershire sauce 
1 1/2 tsp rice wine vinegar 

Optional toppings: corn, mung beans, hard boiled eggs, lime slices, avocado, cilantro, grated carrots, cucumber slices, cooked mushrooms, etc. 

Tools:
Medium pot 
Whisk 
Wooden mixing spoon
Measuring cups/spoons 
Cutting board 
Chopping knife 

Add water to the pot and put over medium heat. Add mushrooms, scallions, cilantro, ketchup, soy sauce, sesame oil, Wostershire sauce, rice wine vinegar, the spicy and chicken flavor packets and lime juice to the pot. Bring the broth to a boil. 

Once broth is boiling, crack your egg straight into the middle and whisk rapidly for a minute. Add the tofu cubes and ramen noodles. Cook for 3 minutes until the noodles are al dente. Turn off heat and serve immeditately.

Use whatever toppings you want to add texture and flavor to the soup. I squeezed some fresh lime on top and added corn, mung beans, cooked mushrooms, extra tofu and a hard boiled egg. 

And let me tell you- it was delicious!! Super heart warming and a giant leap from the ramen we all knew and loved in college!! Try it out! Xo


Thursday, September 4, 2014

Corn & Leek Chowder

Corn chowder or any variety of corn soup is definitely my favorite and go-to soups. And since summer is sort of winding down and since I'm in great denial of it ending- I figured I would use some of my local Connecticut corn for yet another dish. 
And besides the pain of controlling the corn kernels flying everywhere (even in a bowl it seems to happen)- this soup is easy and delicious. Yet another simple tasty meal. And bonus: the baby loved it! 


Corn and Leek Chowder

Fridge: 
2 cups whole milk
1 cup heavy cream 
8 pieces uncooked bacon, minced roughly
2 large leeks, cleaned and diced small 
1 tsp thyme, minced (can use dried) 
1 small red pepper, deseeded and minced

Counter: 
8 ears of corn, kernels cut off the cob
1 medium yellow onion, minced 
2 garlic cloves, minced 
5 small red bliss potatoes, diced small (about 3.5 cups) 
2 cups water
Juice of 1 lemon 

Pantry:
2 cups chicken stock 
1 bay leaf 
1 1/2 tsp salt
1/2 tsp black pepper 

Tools:
Blender
Large pot with lid
Wooden spoon 
Ladle
Slotted spoon 
Cutting board 
Chopping knife
Measuring cups/spoons 

Heat the pot over medium heat until hot. Add the minced bacon and cook until crispness of your choice. I like mine extra crispy so I cook it for a while. Using a slotted spoon, remove the bacon while keeping the rendered oil in the pot. Put the cooked bacon aside- it will be added back later. 

Add the minced onion and leeks to the bacon oil. Cool for 5 minutes while stirring occasionally and then add the minced garlic and corn kernels. Cook for another 5 minutes and add the potatoes, thyme, salt, pepper, water, bay leaf, chicken stock, milk, and heavy cream. Turn the heat to low, put on lid and simmer for 30-40 minutes. Taste for seasoning and add more salt and pepper if you like. 

At this point take a few large ladlefuls of the soup and put in the blender- around 3 cups. Process it for a minute until completely puréed. Add this back to the pot. 

Add the red pepper and bacon and cook for another 15-20 minutes on low. Squeeze the lemon juice in at the end and mix in. 

Soup is done and ready to eat! It's perfect for the cooler nights at the end of summer. Enjoy! Xo


Thursday, August 28, 2014

Farm Stand Gazpacho with Watermelon & Corn Relish

Summer is the season of watermelon, corn and tomatoes. This is usually the time of the year that I make a ton of recipes using these items. They are just perfectly ripe, sweet and delicious during the summer months and yes you can get them 12 months a year now but it's just not the same taste. So work these three ingredients into your life the next month or so because they'll be gone before you know it. 
And luckily I have an amazing farm stand open every day just down the road from work. Sandy's Summer Stand in between Riverside and Cos Cob in Connecticut is the perfect place to grab fresh local summer produce. Go find your farmers market or local roadside stands and grab some summer delights!
And best yet- this gazpacho requires just some rough chopping and a blender. It's mindless cooking. And yet it's impressive and delicious as well. Perfect for a end of the summer dinner party- and if Charlie, a 15-month old, devours it- anyone will!! Try this one people!! 


Farm Stand Gazpacho with Watermelon & Corn Relish 

Fridge: 
1 small cucumber, peeled and roughly chopped 
1 small red pepper, deseeded and roughly chopped
4 stalks scallions, end removed and roughly chopped 

Counter:
3 large ripe tomatoes 
1/4 of medium red onion, roughly chopped 
4 garlic cloves

Pantry:
1/2 cup olive oil
2 tbs sherry vinegar
1 tsp salt
1/2 tsp black pepper 
1/4 tsp cumin 

Tools:
Blender or food processor
Large bowl
Mixing spoon
Measuring cups/spoons
Cutting board
Chopping knife
Peeler 
Plastic wrap

Take all the ingredients and add them to the large bowl. Cover with plastic wrap and marinate for 2-4 hours or overnight if you prefer. 

After the ingredients have marinated, add them in batches to your blender or food processor and blend or pulse until desired consistency is reached. I like mine slightly chunky. If you prefer completely smooth- you can run it through a sieve or chinoise post processing. 

Once processed, add it to a Tupperware and refrigerate for a few hours. I like to do this part overnight to allow the flavors to really meld. Gazpacho is always best a day or two after it's made. 


Watermelon & Corn Relish

Fridge:
1 1/2 cups watermelon, diced small
Cooked and cooled corn removed from 1 ear of corn
6 leaves of basil, julienned 

Pantry:
Pinch of salt
Crack of black pepper

Tools:
Medium mixing bowl
Mixing spoon 
Cutting board
Chopping knife
Measuring cups

Add all the ingredients to the bowl and mix. Place a tablespoon or two in the center of the chilled soup for serving. 

It's a great balance of the zestiness of the gazpacho and the sweetness of the watermelon, basil and corn. 

I just love this recipe, it's so delicious and simple to make! Enjoy it! Xo


Summer farm stands are the best!! I got every ingredient (minus the seasonings) from this stand. Bonus- one trip shopping!