Tuesday, November 29, 2016

Chocolate Bourbon Pecan Pie

Thanksgiving has come and gone. I have so much to be grateful for this year. From my new business to my new home to my lovely family to my perfect dog to my super supportive and amazing boyfriend- goodness, 2016 has been great to me!! Blessed doesn't even cover it- but enough about me and more about pies. This thanksgiving I made a pie that has been raved about enough to be requested by a local Darien restaurant (yes, my desserts are served at a restaurant in Darien- yet another thing to be thankful for). So I figure this recipe is good enough to blog about! Enjoy this pie- it's so easy, especially if you cheat and use Trader Joe's pie crust- my fave since they use real butter in it. 


Chocolate Bourbon Pecan Pie  

Fridge:
3 eggs 
5 tbs butter, melted 

Freezer:
Pie crust of your choice- I use Trader Joe's 

Pantry:
1 1/4 cup chopped pecans 
1 1/4 cup semi sweet chocolate chips 
3/4 cup dark corn syrup
3/4 light brown sugar 
3 tbs cocoa powder 
2 tbs ap flour 
1 tbs instant espresso 
2 1/2 tbs Bourbon 
1 1/2 tsp vanilla extract 
1/2 tsp salt 

Tools:
1 large bowl 
Whisk
Measuring cups/spoons 
10-inch pie dish 
Baking spatula 

Preheat oven to 335 degrees. I prefer it a little cooler than the usual 350 degrees for pies. 

Roll your dough and line your pie dish with it. Prick with a fork a few times on the bottom. 

In the large bowl- whisk the eggs. Add corn syrup, brown sugar, vanilla extract, ap flour, cocoa powder, instant espresso powder and salt. Mix well. Add chocolate chips and pecans. Mix and pour into prepared pie dish. 

Bake for 40-45 minutes. Check after 30 minutes- if the crust begins to get too dark, cover the whole pie with tin foil. Continue baking until the crust is slightly firm- it will give a little after pressing- that's ok. It will firm up when cooling. Remove from oven and cool. Serve with homemade whipped cream. Enjoy!! 


Thursday, October 27, 2016

Raw Vegan Everything-But-The-Kitchen-Sink Energy Balls

A LOT has been happening the past few weeks. I have finally got my business up and running. Whats that you say? Business? Yes I have started a new business. Check it out at www.maikanafoods.com. Its a neat little website where you can order my delicious and healthy creations and then have them delivered right to your door! My goal is making healthy yummy food as convenient as can be. Thus far this first week is going grand! Not to brag but Maikana has been getting excellent reviews. I could NOT be happier about it! Yay!! With this new business I have been working on a lot of new dressings and healthy bites and snacks. One of the little treats I've been included as a "thank you" to our clients are these vegan, raw, healthy, energy balls- if you will. I could not think up a name for something that I threw pretty much every healthy item in my pantry into...but hey, they taste good and are a nice, actually healthy, sweet treat. Can't beat that. Plus you just throw all the ingredients into a food processor and you're done. Super easy!


Raw Vegan Everything-But-The-Kitchen-Sink Energy Balls

Pantry:
1 cup raw walnuts
18-20 medjool dates, pitted
1/4 cup raw cacao powder
1/8 cup matcha powder
1/8 cup hemp seeds
1/4 cup shredded coconut (extra cup if you want to roll the balls in them afterward they are done)
1/4 cup oats
1/8 cup chia seeds
2 tbs milled flaxseed
1/8 coconut oil, room temp (not melted) is fine
Pinch of salt

Tools:
Food processor
Medium melon baller (optional)

Take all the ingredients and put them into your food processor. Blend until a paste or almost dough forms. Remove from the food processor and using either a melon baller or your hands, eyeball a 1 inch ball and roll in your hands until round. They might be a little oily from the coconut oil but that's ok. After you have rolled the paste into balls, you can now roll them in the extra shredded coconut or topping of your choice or nothing at all. At least point refrigerate for at least an hour to firm up. Keep them refrigerated and grab them as a sweet energy treat whenever you are craving one. They will keep for up to a week in the fridge or 2 months in the freezer. Enjoy them! xo


Wednesday, October 19, 2016

Pumpkin Zucchini Bread

Yes, folks, it's that time of year again. Pumpkin season. Although I'm not the biggest fan of people adding pumpkin spice to everything, there are occasions, such as this, that pumpkin spice is necessary. But please- keep it out of my candy, chips and hummus (yes I've seen pumpkin spiced hummus). This was one of those recipes where I ha a zucchini on it's last legs and needed to find a use for it and I must say- it was well used. This is a great addition to breakfast or snack time. And a great way to get rid of that extra can of pumpkin puree laying around from last year's holiday season.


Pumpkin Zucchini Bread

Fridge:
1 1/2 cups zucchini, shredded
2 eggs

Pantry:
1 3/4 cup flour
1 cup pumpkin puree (I use Trader Joe's canned organic pumpkin puree)
1 cup white sugar
1/2 cup canola or vegetable oil
1 1/2 tsp pumpkin spice
1/2 tsp ground cinnamon
1 1/2 tsp vanilla extract
1/2 tsp baking soda
1 tsp baking powder
1/2 tsp salt
1/3 cup walnuts, chopped
Spray for baking dish

Tools:
2 medium mixing bowls
1 loaf pan
Whisk
Measuring cups/spoons
Box grater
Chopping knife
Cutting board
Baking spatula

Preheat oven to 325 degrees. Spray the loaf pan with canola oil.

In one bowl add all the dry ingredients: flour, sugar, salt, baking powder, baking soda, pumpkin spice, and cinnamon. Mix well.

In the other bowl add eggs, pumpkin puree, vanilla, and oil. Mix well. Add zucchini and walnuts and slowly begin to add your dry ingredients. Whisk all the ingredients together well but do not over mix.

Pour batter into the prepared loaf dish. Bake for 45 to 55 minutes or until a toothpick comes out clean when pricked into the center of the bread. Remove and allow to cool slightly before removing from the loaf pan. Serve warm with some butter. Yum!! Enjoy. xo


Monday, October 10, 2016

Best Coconut Cake Ever!!

I just finished this book called "The Coincidence Of Coconut Cake" about a chef and her romance/restaurant dramas. All I could think about while reading it is that I'd love to master a really kick ass coconut cake like she does in the novel. So this started the wheels rolling and I created what I'd like to think of as the bestest ever coconut cake. It's light but not crumbly and has an awesome but subtle coconut flavor. The cake alone is great but the frosting adds another dimension to it. I'd have to say I'm pretty in love with this cake. I'm thinking of making it again soon because it's that crave worthy. If you're a cake fan or a coconut fan- this is your next dessert to make at home!


Best Ever Coconut Cake

Fridge
4 eggs, separated
1/2 cup (1 stick) butter, softened
1/4 cup milk

Pantry
2 1/2 cups ap flour
1 3/4 cups white sugar
1 1/2 tsp baking powder
1 tsp baking soda
1/2 tsp salt
1 1/2 tsp coconut extract
1/2 tsp vanilla extract
1 cup thick coconut cream (I use Trader Joe's extra thick coconut cream in a can)
1/4 cup canola oil
Spray for baking dish

Tools
1 Bundt cake dish or 9x13 baking dish or 2 9-inch rounds
Large mixing bowl
2 medium mixing bowls
Electric hand mixer or standing mixer
Baking spatula
Whisk
Measuring cups/spoons

Preheat oven to 350 degrees. Spray your preferred baking dish with canola oil spray.

Using the mixer, cream together the softened butter and sugar. Add in yolks and coconut cream. Continue to mix. Then add in both extracts, milk and oil. Mix until just combined.

In separate bowl whisk the egg whites until almost stiff. Set aside.

In other medium bowl add all the dry ingredients left: flour, baking powder, baking soda, and salt. Mix and then slowly add to the wet ingredient bowl, while mixer is on. Once it is all combined and you have scraped down the sides of the bowl with your spatula, begin to fold in the egg whites. Fold in until well combined- you do not want to see any white foam left.

Pour batter into your prepared baking dish. Place in the oven and bake for 30 to 40 minutes depending on which baking dish you chose. Check after 30 minutes. Cake is ready when a toothpick inserted into the middle comes out clean or when the top is golden and it is spongy to touch. Remove from oven and set aside to cool. Begin the frosting. See recipe below.


Coconut Cream Cheese Frosting

8 oz cream cheese, softened
1/2 cup (1 stick) butter, softened
4 tbs coconut cream, extra thick (should be leftover from the can)
1/2 tsp of coconut extract
Pinch of salt
2 cups of confectioners sugar
3/4 to 1 1/4 cup shredded sweetened coconut for decorating (optional)

In a medium bowl add the cream cheese and butter. Using a hand mixer or standing mixer, mix until well combined. Add your coconut cream, coconut extract, pinch of salt. Mix again. Then while mixer is on, slowly add your confectioners sugar. Taste frosting to make sure its your intended sweetness. If you prefer more sweet, you can add 1/3 cup more confectioners sugar. Once cake is cooled completely, frost the oustide and add the shredded coconut to decorate. I put mine on the outside of the bundt cake but you can cover the whole cake or whatever you prefer. Enjoy this cake! It was devoured in our household. It really is the BEST coconut cake ever!! So delicious!! xo


Sunday, September 18, 2016

Apple, Pomegranate & Kale Quinoa Salad

How the heck did it become fall again?! This year has flown by and I am not ready to break out sweaters yet- ugh. #whereistheendlesssummer But to be fair- I am ready for the fall foods- bring it on! Chris and I picked up some delicious apples from Bishop's Orchards in Guilford this past weekend and I decided to do a healthy food recipe collab with my homegirl and beautiful nutritionist friend- Katie Diehl. I came up with the recipe and she wrote about the health benefits of the recipe- all based on the apple season. Yay! The collaboration is featured on www.darienmoms.com this week also- woohoo! Check out that website and Katie's new lovely site at: www.diehlnutrition.com These ladies are killing it. Oh and after you're done scoping out their sites, make this recipe because it's plain ol' fabulous. 


Apple, Pomegranate & Kale Quinoa Salad

Fridge:
1 cup pomegranate seeds 
1 to 1 1/2 cups baby kale, large stems removed and roughly chopped 
1/3 cup scallions, thinly sliced
1 1/2 tbs mint, finely minced
1 1/2 tbs Italian parsley, finely minced 
1/2 tsp Dijon mustard 

Counter:
2 cups apples (I used honeycrisp and ginger gold)- small dice, skin on
1 1/2 cups water 
Juice of 1 lemon (approx 2-3 tbs) 

Pantry:
1 cup quinoa 
4 tbs apple cider vinegar 
1/4 cup olive oil
1 1/2 tsp salt
1 tbs honey
Pepper to taste 

Tools:
Small pot with lid
Large mixing bowl
Small mixing bowl 
Mixing spoon/spatula 
Whisk 
Fork 
Measuring cups/spoons 
Cutting board
Chopping knife 

In the small pot add quinoa, water and 1/2 tsp of salt with a few cracks of fresh pepper. Place on medium high on the stove and bring to a boil. Once boiling, turn heat to very low, cover and cook for 10 minutes or until all the water is absorbed. Remove from heat and remove the lid. Allow to cool. Using a fork, mix the quinoa. Allow to cool completely. You can refrigerate if you prefer. 

In the large bowl add the small apple dices and squeeze half the lemon juice on top. Mix with a spoon to coat apple pieces. Add the cooled quinoa to the large bowl. Add the pomegranate seeds, kale, scallions, mint, parsley and 1/2 tsp of salt and pepper to taste. Squeeze the rest of the lemon juice onto the entire salad. Mix well. 

In the small bowl whisk together the apple cider vinegar, Dijon mustard, 1/2 tsp salt, pepper to taste, honey and olive oil. This is the dressing. Pour over the quinoa salad when ready to serve or up to a day before. This salad keeps for 5 days so it's a great side to make ahead. Enjoy it! Xo


Wednesday, September 14, 2016

Baja Fish Taco with Southwestern Chipotle Slaw

Taco Tuesdays has legit become a thing. My Instagram is filled with hashtags and tacos and chips and margaritas every Tuesday. I am constantly craving them and having FOMO. Not this past Tuesday though!! Chris and I decided to have a date night at home and I made these awesome fish tacos. There are a few steps and I did little over the course of a day- so don't feel overwhelmed to do it all at once. The slaw can be made the night before. But once it's done- it's SO worth it!! Chris said it was even better than my old restaurant, Mamasa's fish taco. Impossible! 


Baja Fish Tacos with Southwestern Chipotle Slaw
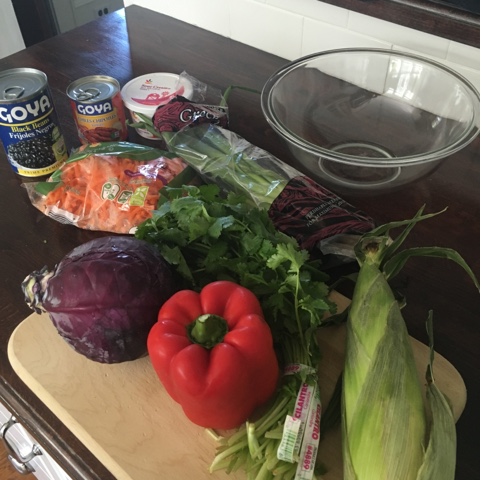
Slaw:
3 cups of red/purple cabbage, thinly julienned 
1 cup canned black beans, rinsed and drained
1 cup corn kernels, cooked, cooled and cut off the cob 
1/2 cup red pepper, small dice
1 1/2 cups carrots, shredded
1/4 cup scallions, thinly sliced
2 tbs cilantro, minced 
1/2 tsp salt
Pepper to taste 

Slaw Dressing:
1 cup (8 oz) of sour cream 
1 1/2 tbs of adobo sauce from chipotle can (add actually chipotles, minced if you like heat) 
2 tbs cilantro, minced 
Zest of 1 lime
Juice of 1 lime (approx 2 tsp) 
1/4 tsp cumin powder 
1/2 tsp salt
Pepper to taste 

Fish:
2- 3 large filets of tilapia or solid white fish, cut into strips (easily fit in your choice of tortilla side)- 
6 tortillas 
1/2 cup flour 
1tbs Cajun seasoning
2 eggs, whisked 
1 1/4 cups plain Panko breadcrumbs 
1 tsp salt
1/2 tsp pepper
Juice of 1 lemon 
1 avocado, sliced for serving 
Lime slices for serving 
5 tbs of canola oil 

Tools
Frying pan 
Spatula or tongs
Large mixing bowl 
Small mixing bowl
3 plates or shallow wide bowls
Salad serving spoon/tongs
Whisk
Measuring cups/spoons 
Cutting board 
Chopping knife 

For the slaw: In a large bowl mix together all ingredients listed under slaw. Combine well.

For the dressing: Whisk together all ingredients listed under dressing. Set aside to dress the slaw before serving if you like a crisp slaw or an hour before serving if you prefer it a little softer. I prefer mine crisp. You do not need to use all the dressing if you don't want to. 

For the Baja fish: In the first shallow bowl add flour and Cajun spice. Mix well. In second shallow bowl add the whisked eggs. In third shallow bowl add the Panko breadcrumbs and salt and pepper. This will be your order for breading the fish. 

Squeeze half of the lemon onto the fish strips. Sprinkle with a little salt and pepper. Take each strip and dredge them in the flour mixture, then dip them in the eggs and finally coat them in the Panko breadcrumbs. Put on a plate until ready to fry. 

Heat the canola oil in the frying pan over medium heat. Once hot, add the breaded fish strips to the pan. Be sure to not overcrowd it, as that brings the oil temperature down. Depending on your pan size, you may need to fry in batches. It takes about 2-3 minutes per side for thicker pieces and 1-2 minutes per side for thinner ones. If they are browning too fast, turn down the heat to medium/low. 

Remove fish from frying pan and place on a plate lined with paper towels to absorb extra oil. 

Serve tacos by placing the tortilla on the plate, add the fish strips on top, then the southwestern chipotle slaw with a couple strips of avocado and lime slices on the side. Omg so good! I want another one right now. Enjoy them!! Xo